How to Draw a Scooter

In this drawing guide, you will learn how to draw a scooter. This is a really popular vehicle in various countries of the world. Scooters appeared relatively recently and very quickly gained immense popularity.
A lot of people prefer scooters to get to work or school. All the more strange that we have not drawn this beautiful thing before, isn’t it? But today we will fix this problem.
We decided to draw a fairly simple scooter. However, there is a slight complication here – the angle. Because of this, some proportions in the steps will seem rather strange to you. However, in the end, you will get a great drawing.
As in most of our drawing lessons, this tutorial on how to draw a scooter focuses on realism. Our goal is to reproduce volume and include just the right amount of detail to make this vehicle look as natural as possible. As you can see, the scooter consists of several parts: the handle, the deck where the person stands, and the wheels.
Each of these parts is made up of basic geometric shapes – the handlebars are a set of cylinders, the deck is a flat, elongated rectangle, and the wheels are circles or very flat cylinders. Keep this in mind: by using the principles of constructing complex objects from simple shapes, you’ll be able to draw a scooter that looks both three-dimensional and realistic.
How to Draw a Scooter Step-by-Step
Step 1: Sketch the deck and stem of the scooter
First, draw four straight lines that form an angle like in our sample. The horizontal lines are slightly further apart than the vertical ones. And that’s a pretty important thing for the whole scooter drawing.

Step 2: Draw the scooter’s handle
Secondly, draw the outlines of the steering wheel. It looks like a small horizontal cylinder at the top of our drawing. Try to draw these steps without the aid of a ruler to practice your drawing skills.
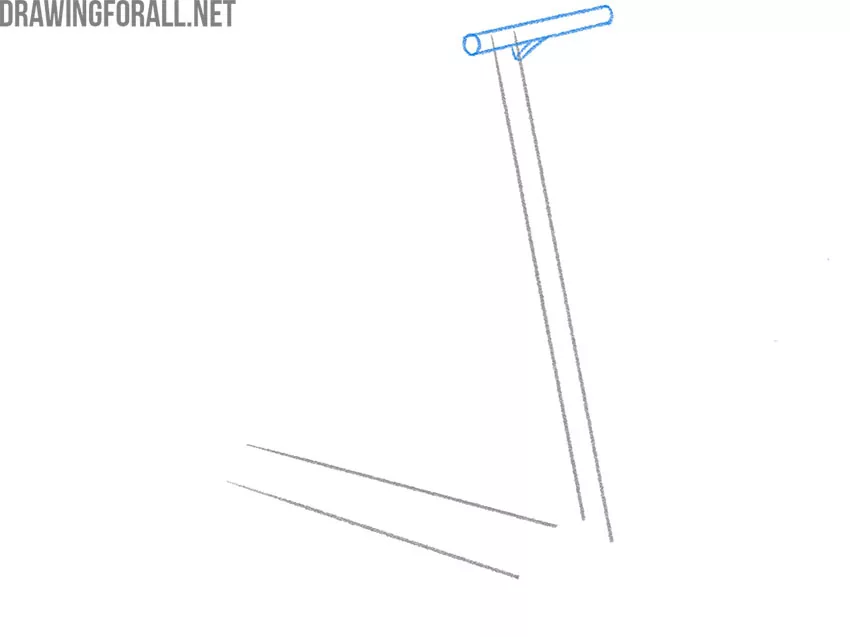
Step 3: Draw the connection between the stem and deck
Thirdly, draw the side contours of the deck. These are two lines with a smooth bend, which are connected to the horizontal line farthest from us with only one point.

Step 4: Draw the side edge of the scooter deck
Connect the steering wheel and deck with two oblique lines. This detail should not be too wide and large, as you can see.

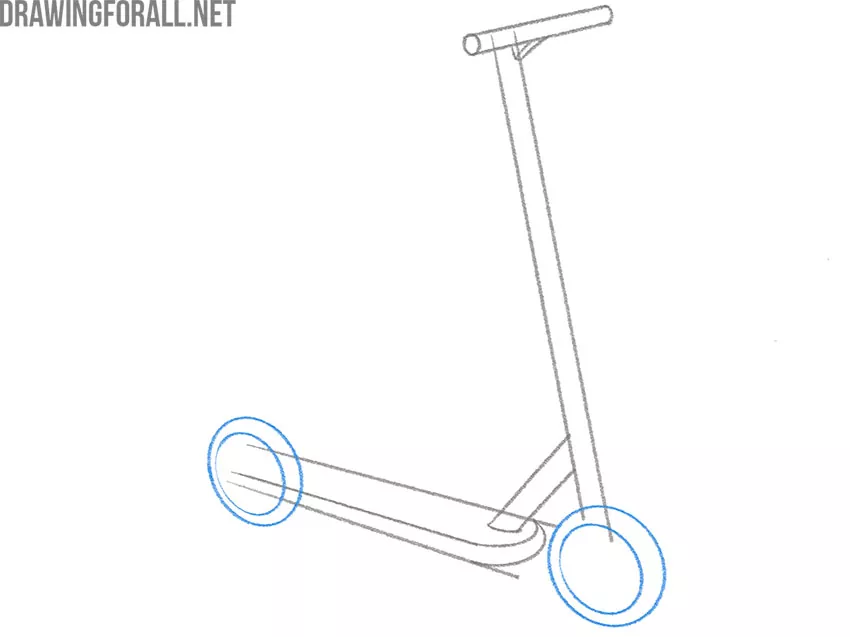
Step 5: Draw the scooter’s wheels
Add wheels. Due to the peculiarities of the angle, the wheels look like ovals. Inside each wheel, draw another small oval like in our sample.
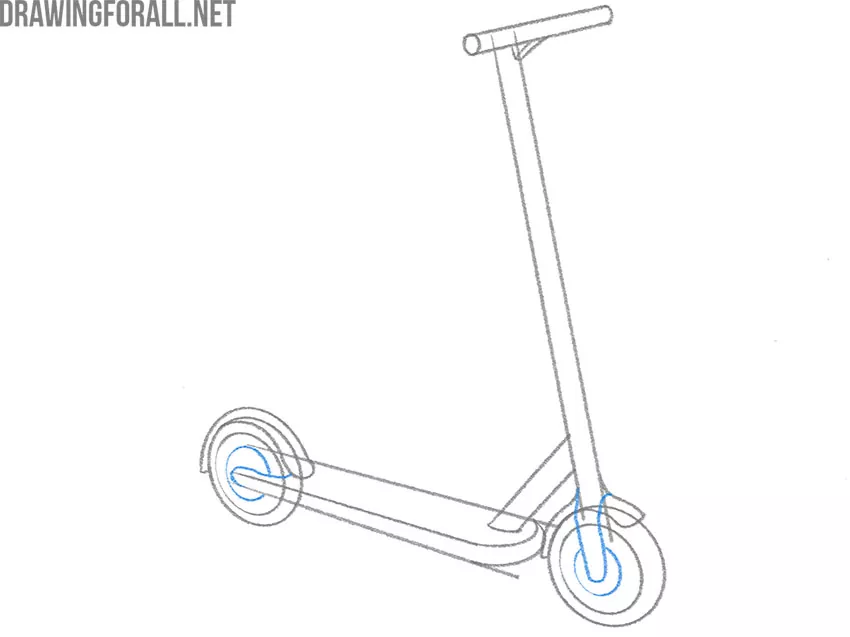
Step 6: Add arches above the wheels
Depict the wheel fenders of our scooter. The rear fender is longer than the front fender and covers more of the wheel.

Step 7: Draw the wheel fork and axles of the scooter
And one more small detail. In this step, add small mounts for the wheels. Also don’t forget the small ovals in the center of each wheel.
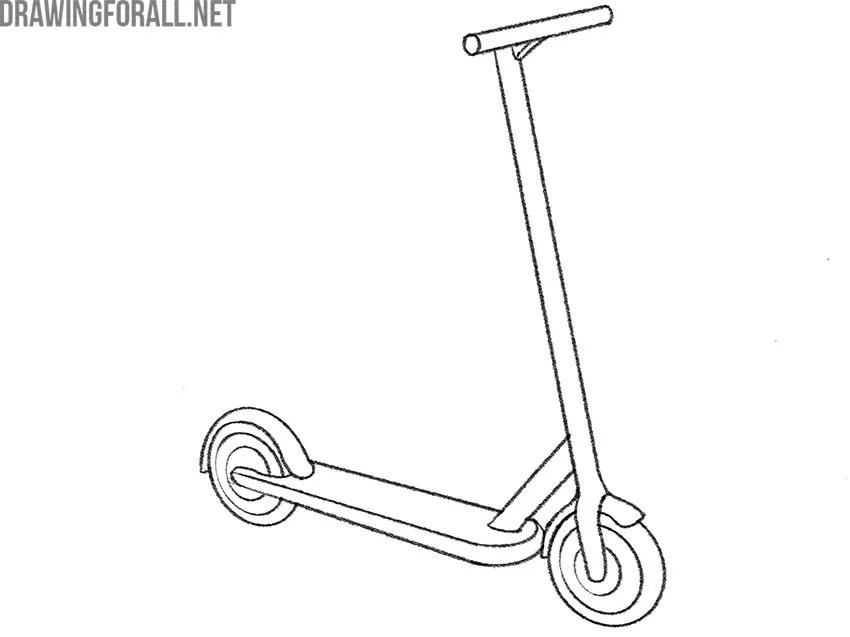
Step 8: Remove the construction lines
Erase extra lines from the entire drawing. Evaluate the entire scooter, and check the proportions and shapes of each part.
Step 9: Add volume to the scooter drawing
So, add small shadows to certain parts of the scooter. It looks like one or two layers of hatching. You can make more contrasting shadows with a second layer of hatching. Don’t forget the shadow on the ground.
As a result, your drawing looks something like our sample. If you see too much difference, try to find the step with a mistake and fix it.

As we mentioned earlier, to achieve a more realistic and three-dimensional look, it’s important to visualize the scooter as a set of basic geometric shapes – simple forms like cylinders, rectangles, and similar elements. Keeping this in mind will help you draw the scooter from various angles while maintaining a sense of volume and realism. So try to approach it this way.
Also, try drawing a boy standing on your scooter, trying to combine more complex shapes into the drawing and create a more detailed composition.
If you haven’t yet mastered the basics of volume, be sure to check out our article on form and volume – it will help you get much better results. We also recommend diving deeper into the concept of volume in drawing, as it forms the foundation for creating convincing three-dimensional objects.
We hope you get great results. We will continue to create new drawing lessons and expect feedback from you in the form of comments. It helps us a lot!