How to Draw a Ghost
In this drawing guide, we will tell you how to draw a ghost. We mean drawing a scary ghost with an emphasis on realism. We decided to specifically complicate this lesson so that the ghost looks cool, scary, and natural.
Many people imagine ghosts in completely different ways. These could be transparent figures of people in strange clothes or simply vague silhouettes with visible facial features. We decided to choose the second option because it is darker and scarier, in our opinion. Implicit threats are always scarier, so blurry silhouettes and fuzzy outlines with facial features are always very impressive.
We chose a rather difficult angle to draw the ghost. If you want to simplify this, draw the ghost completely frontally.

How to Draw a Ghost Step-by-Step
Step 1: Sketch the shape of the ghost
First, draw a rough outline of the cast. This can be any shape of your choice. We decided to use a pentagon with smooth, rounded corners. Place this shape in the center of your piece of paper. Use only light strokes in this step. We will be erasing a lot of this in the future.

Step 2: Start forming the ghost’s silhouette
Add some detail to this blurry figure. Smooth horizontal lines perfectly simulate a dramatic swing of the arms. The front of the ghost is closer to us, so we see a very asymmetrical figure.

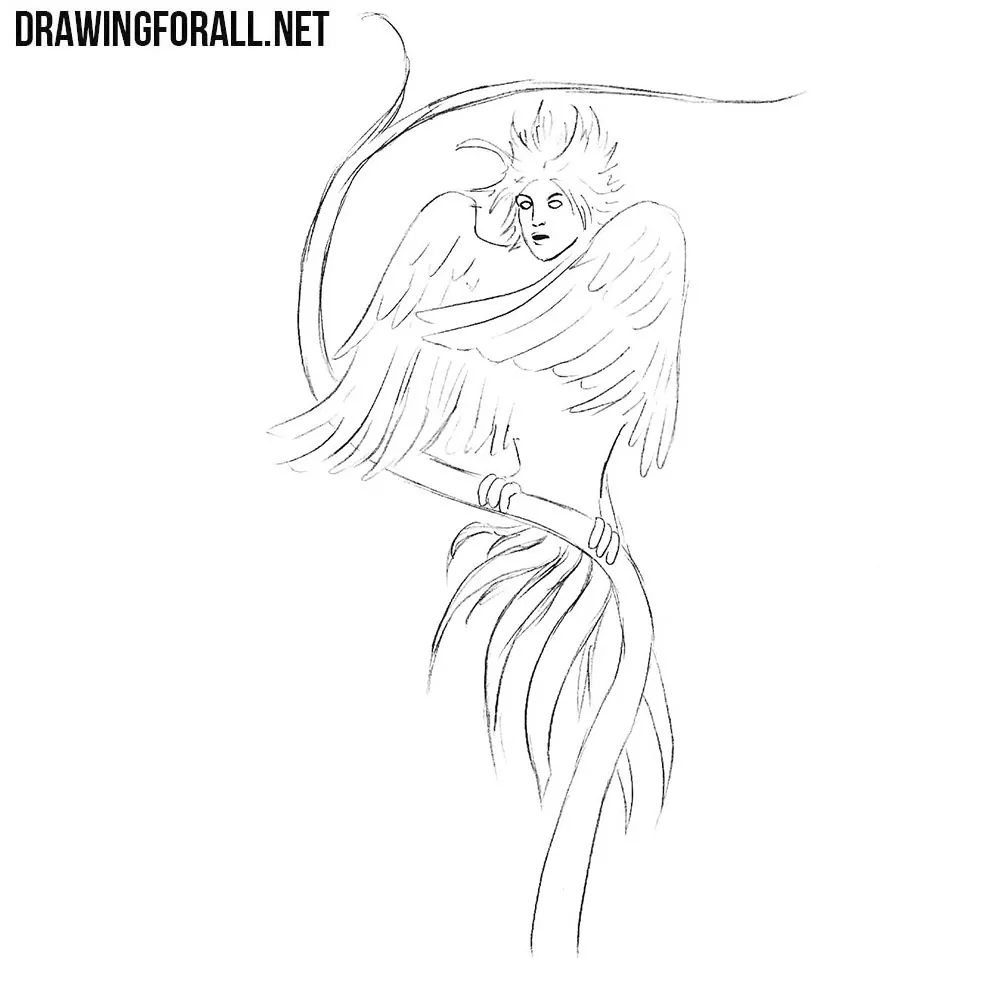
Step 3: Start adding details of the face
This is one of the most important parts for us. Depict the contours of the face with an expression of suffering. Don’t draw the nose and ears. Don’t draw unnecessary details. A minimum amount of detail and maximum blur will make the drawing very scary.

Step 4: Draw the ghost face
Outline the top of our ghost. Draw two long vertical lines to the right and left of the face. Ideally, it should look like the hood of an old, threadbare clothes or the top of a sheet. This should already be scarier than a witch or a zombie.

Step 5: Draw the sleeves of the ghost
Remember the conditional “hands” from the second step? Draw the edges of the torn, hanging fabric over these arms. Don’t place the rag lines too often or too close together. Add some vertical folds along the edges of our ghost’s outline.

Step 6: Draw the bottom of the ghost clothes
Depict some more blurry lines on the ground. It could be wavy lines or what looks like fog over the ground. As a result, we create the effect that a ghost is floating above the ground, and its lower part does not have a clear boundary.

Step 7: Add some folds to the fabric
Add some more folds to our ghost. It’s fabric, so you can draw the folds as you normally would when drawing fabric. It looks like several vertical and smoothly curved lines. Folds in our case are very important, since this is the main way to depict the contours of the ghost.

Step 8: Erase the construction lines
So, we continue with the ghost drawing guide. Remove extra lines from the entire drawing. Erase the basic outlines from the first steps to see what our ghost will look like.

Step 9: Add shadows to the ghost
Fill in the contours of the eyes and mouth with dense, intense shading. Add small areas of shadow to the area under the ghost’s hood and under some of the larger folds. By the way, this is a rather interesting technique. We depicted facial features as shadows, without obvious contours. These things always create an atmosphere of fear.
As a result, we can see something like the appearance of the ghost. In your case, it may look completely different depending on your imagination.

We hope you drew a very impressive ghost. Halloween is coming soon and we are planning to draw some more classic monsters. If you have ideas for new lessons, write to us in the comments. This helps us a lot in our work!
Also, don’t forget , that our site offers a huge variety of fascinating drawing lessons featuring all kinds of monsters, each one drawn in a clear and convincing style.
To explore them all, make sure to check out the Myths and Legends category. And don’t forget to visit the Basic Drawing Lessons category as well, where we break down how to draw the human figure – an essential skill, since most monsters are based on human anatomy.


love it
Yes I loved this too like a lot thank u for all u do Stepan Ayvazyan.
Thank you, Diego. Nice to see this ghost drawing tutorial was useful.
same here!
bro can u make funny pics or roblox ones I don’t see any at all
😭
I loved this it helped my improve my skills in art and I’m 11 and I’m great now ever since I drew this