

How to Draw a Closed Rose
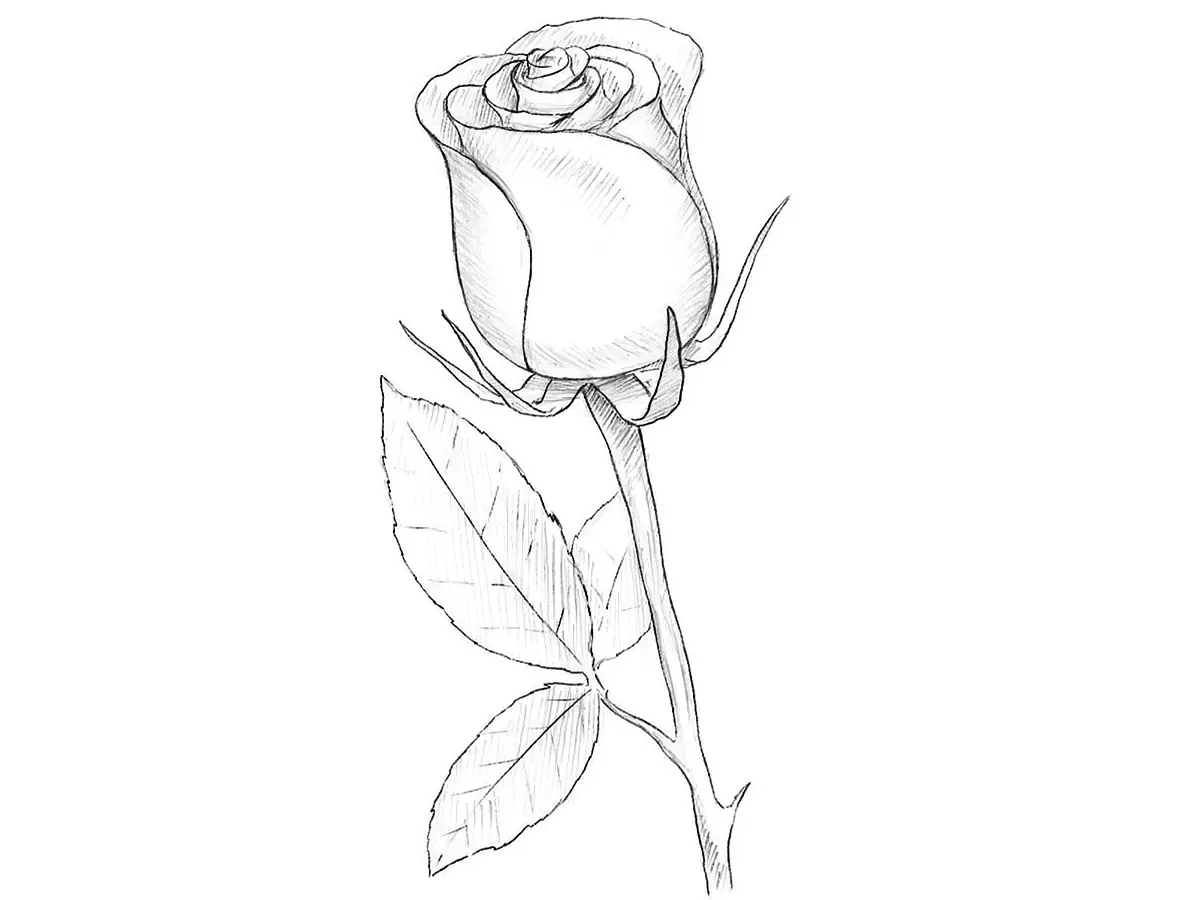
This detailed tutorial will show you how to draw a closed rose and explain how its bud differs from an open one.
Earlier, we showed you in detail how to draw a rose and covered the most fundamental principles that help depict this flower realistically.
We have also already shown you how to draw an open rose with a fully opened bud. Here, we will focus specifically on the closed version and show how to depict this variation in detail, including all its nuances.
How to draw a closed rose step by step
Step 1: Sketch the closed rosebud and stem
The main visual difference between a closed and an open rose is in the bud, with the petals tightly gathered around the central axis. Keeping this in mind, sketch the bud as a vertically elongated oval. Beneath it, draw the central axis of the stem.

Step 2: Draw the innermost rose petals
In the upper central part of the bud, draw the innermost petals. Mentally imagine a line continuing from the stem upward to this central point. This imaginary line will serve as the central axis around which all the other petals will be arranged.

Step 3: Sketch the upper middle rose petals
Now draw the upper edges of the petals surrounding the central part, keeping in mind that they should be arranged fairly evenly around the central axis. These petals should be slightly larger than the innermost ones, while still remaining tightly wrapped around them.

Step 4: Sketch the petals near the outer edge
Continuing the spiral arrangement of the petals, draw the ones positioned near the outer edge. They should appear slightly more open around the central part, but should not spread too far outward.

Step 5: Draw the closed rose outer petals
Now draw the outermost petals of the closed rose that are most visible. Their edges should smoothly curve downward toward the lower part of the bud. These petals should be slightly farther from the center, while still facing mostly upward rather than spreading widely to the sides.

Step 6: Sketch the sepals around the rosebud
Sepals can also emphasize the closed state of a rosebud and distinguish it from an open rose. In a closed rose, not only are the petals tightly gathered around the central axis, but the sepals may also be raised upward. Draw them as elongated triangular shapes surrounding the bud.

Step 7: Sketch the stem and rose leaves
Give the rose stem a more dimensional appearance by drawing the side edges, while avoiding making the thickness perfectly even along the entire length. From the side of the stem and slightly behind it, draw a thin branch with leaves extending in different directions. Position the leaves slightly behind the stem to create a stronger sense of depth in the drawing.

Step 8: Refine the sepals of the closed rose
Using smooth, clean lines, carefully outline the sepals, giving them a cleaner and more finished appearance. You can also make the sepals closer to the viewer slightly darker than those farther away to create additional depth.

Step 9: Refine the stem and leaf contours
Give the stem a cleaner and more defined appearance while gradually erasing the remaining unnecessary construction lines. Refine the leaves as well, making their edges slightly serrated. The lines of the leaves should be slightly lighter than the lines of the stem to help convey depth.

Step 10: Sketch the veins and refine the rose
Around the central vein of each leaf, draw smaller veins extending outward toward the side edges. They should be positioned at a slight angle. Also check your entire closed rose drawing for symmetry and proportion, and remove any remaining construction lines.

Step 11: Finalize the closed rose drawing
First, determine the darkest areas on the closed rosebud, as well as on the stem and leaves. Then carefully fill them in with even hatching. After that, add tonal transitions and highlights if you want to make the drawing appear more dimensional.

Main features and structure of a closed rose
Now let’s once again reinforce the main differences between a closed rosebud and an open one and try to visualize them.
In an open bud, as we discussed in the lesson specifically dedicated to it, the petals gradually spread outward around the central axis, with each new petal positioned farther from the previous one.
In a closed bud, however, the petals are much more concentrated and tightly gathered around the central axis. The outermost petals are slightly farther from the previous layer, but they still mostly face upward.
Overall, the shape of the bud here resembles a cylinder with rounded edges.

Be sure to keep these principles in mind while drawing a closed rose, and of course try to practice this skill as often as possible.
A similar principle was also used in our tulip drawing tutorial, where the petals are arranged around a central axis.
Practice drawing these and other flowers regularly, using real references and also trying to create drawings from memory.




Cool drawing. love Melissa
Amazing. This really worked. I am so happy with my drawings now. I just realised that I am an artist!!😁😁❤❤❤🎨👩🏾🎨
i draw a rose
cool
Thank you.
I love your tutorial on how to draw a rose but could you make one of how to draw a face, thanks
Many thanks. Soon on the pages of our site there will be lessons on how to draw a face.
i love drawing
I had to do a drawing based on fotography for my art lessons and this really helped me out!! My drawing looks amazing now!!
Wow awesome! I loved how it turned out, my 6th graders love it!
i like your drawing
I’m just a beginner. I can draw shapes and lines.i decided to start by drawing roses.your tutorial is very useful.can you make a tutorial on how to draw a duplex and cyborg
Can i give a tutorial on how to draw a duplex and cyborg