How to Draw Eyes Easy

In this drawing tutorial we will show you how to draw eyes easy. We already have quite a few eye drawing lessons, but from the comments we see that this is a very important topic.
Earlier, we learned how to draw eyes in a very realistic and three-dimensional style, but in this tutorial we used very detailed and realistic style.
In this lesson, we’d like to show you how to draw eyes in a simpler way, without going into unnecessary detail that might overwhelm a beginner. Our goal is to use the most basic techniques to achieve a reasonably realistic result and help you build a solid foundation for drawing more detailed eyes in the future.
If you’ve already tried our main eye drawing tutorial and found it too difficult, or if you were simply looking for an easier method from the start, then this lesson is exactly what you need. Let’s get started.
How to Draw Eyes Easy Step-by-Step
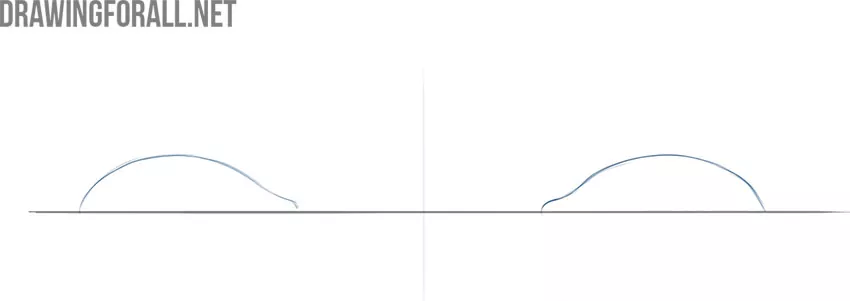
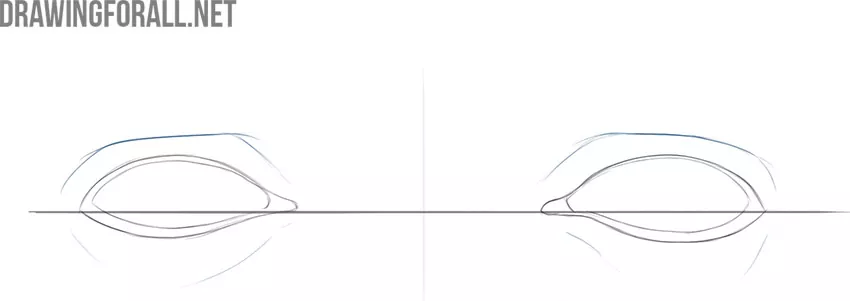
Step 1: Draw the guidelines of the eyes
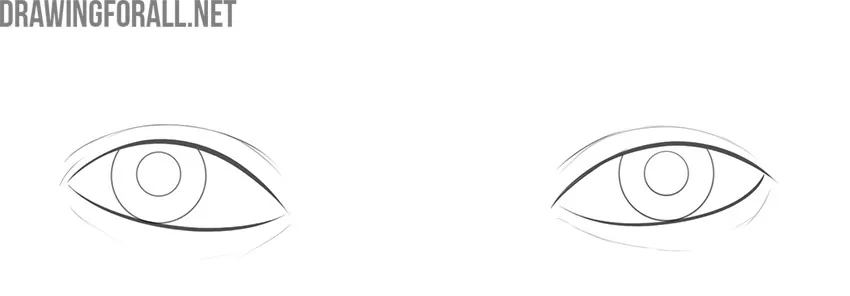
Firstly, draw two crossed lines. The vertical line should show symmetry and divide the drawing into two equal halves. The horizontal line should show the middle of the eye contours.

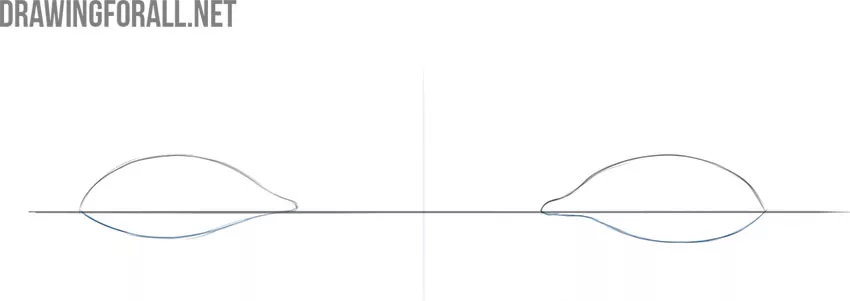
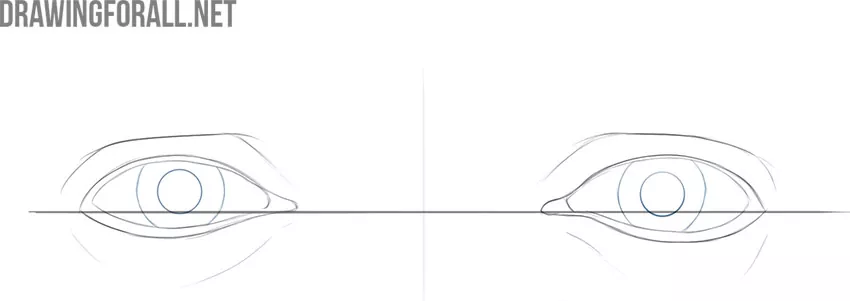
Step 2: Sketch the upper eyelids
Secondly, draw the upper border of the eye using the lines from the previous step. These two figures should be very similar, but avoid perfect symmetry.
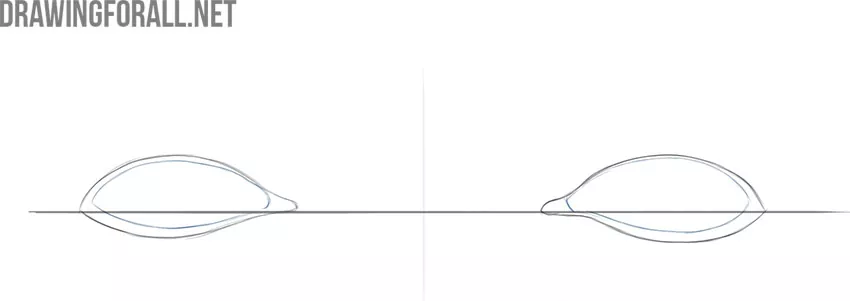
Step 3: Sketch the lower eyelids
Now add the bottom borders of the eyes. The distance between them and the horizontal line is much smaller than in the case of the upper borders
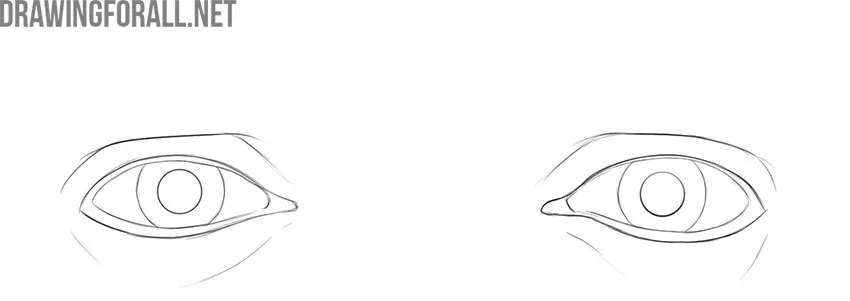
Step 4: Add depth to the eyelids
Add another outline layer, which is located inside the shape from the previous step. By the way, we have a special eye anatomy lesson that will help you better understand what exactly you are drawing.
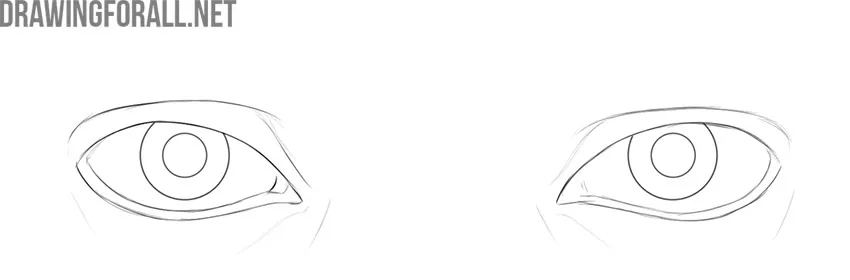
Step 5: Draw the folds above and below the eyes
Depict the skin folds around the eyes. It is slightly wider than the eyelid area. More lines in this step correspond to the older age of the character. It can also be a more frowning and focused look.
Step 6: Draw the pupils inside the eyes
One of the simplest, but very very important actions of the entire drawing lesson. In this step we will draw the pupils. It’s not just little circles. The direction of the character’s gaze and the atmosphere of the whole picture depend on the location of the pupils.
Step 7: Erase the guidelines and complete the drawing
This is the most enjoyable part of the whole lesson, isn’t it? Just remove the extra guide lines from the previous steps and enjoy the result!
The next step is to continue developing your skills by moving on to our main eye drawing tutorial, where we cover eye anatomy in more depth. We also recommend exploring the symbolism of eyes in art, so you can go beyond just drawing them, learning instead how to convey mood, emotion, and personality through techniques available to every artist.
Practice Drawing Easy Eyes of Different Shapes
But adding complexity isn’t the only way to improve your eye drawing skills. You can also try simplifying your eye drawings even further, experimenting with different shapes and details, or sketching from life. For example, use reference images from the internet, sketch the eyes of people you know, or even study your own eyes in the mirror.
Adjust the Shape of the Eyes
Simplify the Eyes Even Further
As the saying goes, the eyes are the window to the soul and in visual art, they often serve as the focal point and emotional center of a portrait. We’ve already discussed focal points and composition in our previous articles, and we’ve also emphasized many times that learning to draw eyes is one of the most essential skills for any artist.
Mastering detailed and complex eye drawings always starts with something simpler – like in this lesson, where we focused on drawing very basic yet convincing eyes.