How to Draw a Muffin
We have baked for you a new tutorial, in which we will show how to draw a muffin step by step. Perhaps many of you know how to cook muffins, and today we will learn how to sketch them as part of a simple food illustration exercise.
As you can see, this muffin drawing looks quite realistic and dimensional. In this lesson, we will try to show you as clearly as possible how to create a convincing bakery sketch and explain how to make it look natural using principles of form, light, and shadow from academic drawing.
By the end of this tutorial, you’ll have a realistic dessert sketch that can easily become part of a still life composition or any other food art scene.

How to draw a muffin step by step
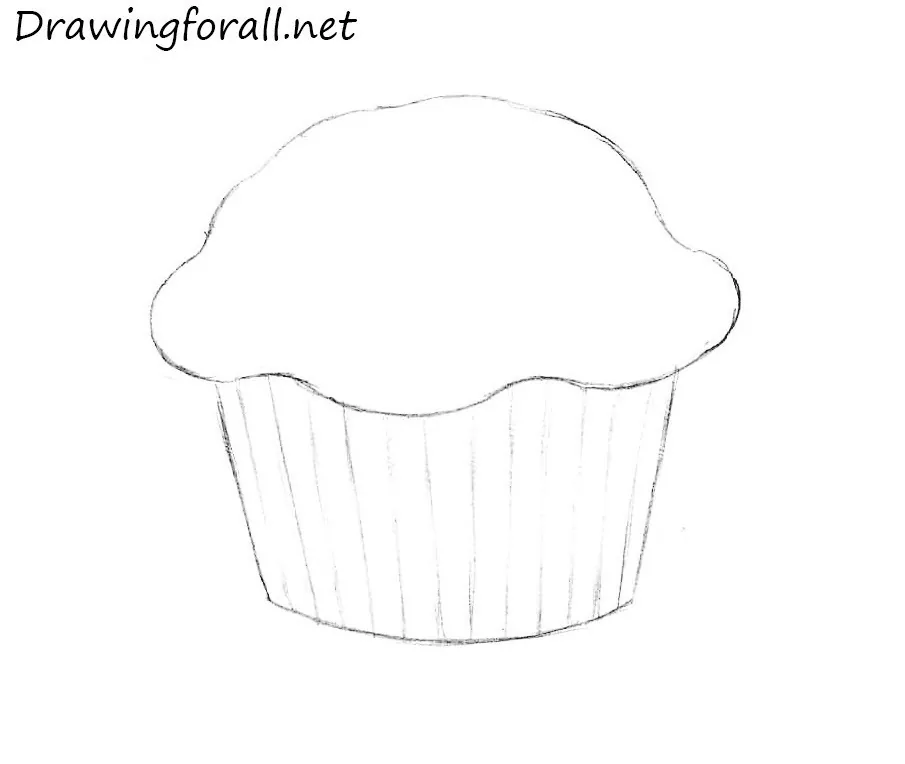
Step 1: Outline the muffin crown shape
Sketch the top part of the muffin. This simple action creates the most important part of your muffin drawing, so begin lightly, using simple construction lines. The upper part should resemble a soft, rounded form, something between a cloud and a tortoiseshell. Don’t try to create a perfectly symmetrical form or add too much details. Keep your hand relaxed to achieve smooth, confident contour lines.

Step 2: Draw the tapered muffin wrapper
Next, outline the lower part of the muffin, that is the paper cup. It should gradually taper toward the base. Avoid making the bottom edge perfectly straight; natural irregularities will make the bakery illustration more convincing. Use light lines to convey folds or pleats where the paper cup meets the muffin. Try to create perspective and volume.

Step 3: Trace the contours and add cup folds
Once you’re satisfied with the proportions, trace your muffin with darker, confident lines to finalize the drawing. Darken the contour and try to convey the curvature. At the lower part, draw long vertical lines to depict the folds of the paper cup. This creates a recognizable rhythm and helps convey the cylindrical structure. When the shape is ready, gently erase all the earlier construction guidelines, keeping the outline clean and ready for further detailing.
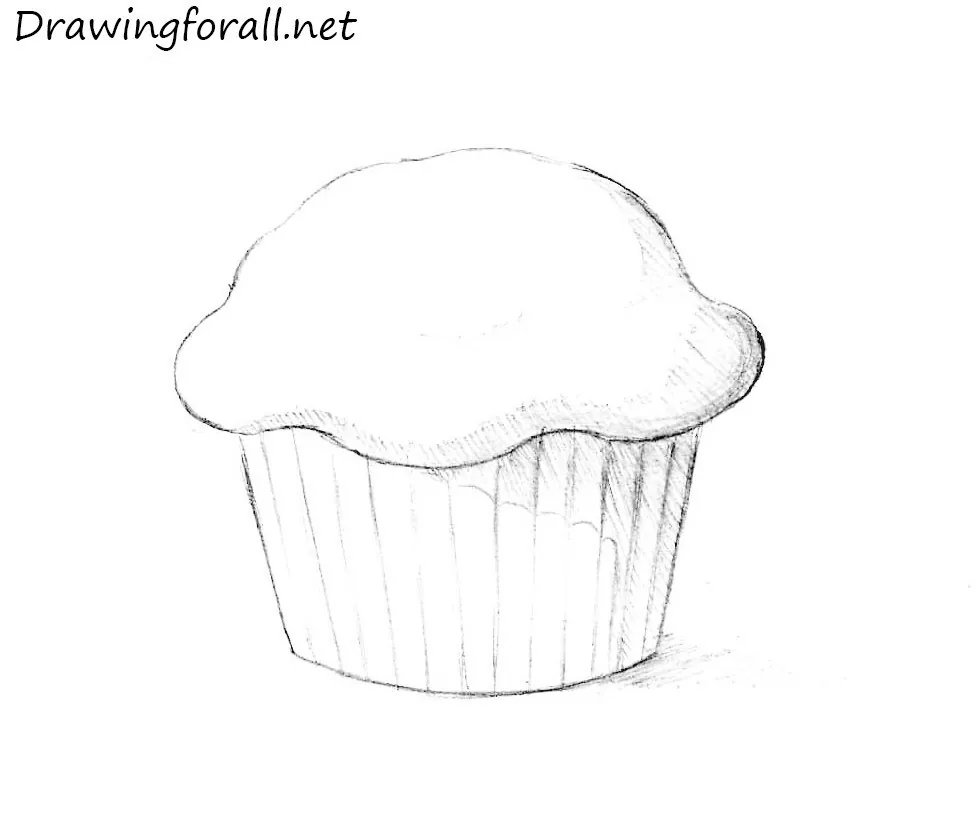
Step 4: Shade the form and add a cast shadow
Now move to shading to give your realistic muffin drawing some volume. Determine the light source – in our example, it comes from the upper left side. Apply hatching and cross-hatching to the opposite side and under the top’s overhang to create tonal contrast. The shadow should gradually fade rather than end abruptly. This approach, often used in academic still-life drawing, helps make the form appear more natural and three-dimensional. Finally, add a cast shadow below the muffin so it appears to rest firmly on a surface, completing your dessert drawing.
Now it’s a great time to make your muffin drawing more individual by adding your own details and nuances. For example, you can modify the top part, change its shape, add a unique texture, or draw crumbs and cracks to make it look more natural.
Another good idea is to work more deeply with light and shadow, introducing complex tonal transitions and emphasizing form and volume as taught in academic drawing.
You can also make the composition richer by placing your muffin sketch in a small scene. Try drawing a muffin beside a cup of coffee to create a cozy, authentic atmosphere, or draw a cake against it to build a more advanced food drawing composition.
It was a muffin drawing tutorial, and if you like to draw food you can take a look at the whole category which is devoted to drawing food. There we tell and show how to draw a huge number of different dishes.
By the way, don’t forget to subscribe to us on social networks. There we post news about published drawing lessons and announcements of upcoming lessons.
go look at the how to draw a donut it’s so easy and good
it is because i can no draw it
Don’t worry, Bridget! Try following the steps slowly. Repeat the steps until you get a good result.
Thanks, Melissa! The donut tutorial is a fun one, glad you liked it.
i like all these beautiful drawing’s
Thank you, Joselene! Glad you enjoy the drawings.