How to Draw a Wine Glass
In this tutorial, we’ll show you how to draw a wine glass—a refined and elegant item found in many kitchens and restaurants.
To sketch this object properly, you should try to make your lines as accurate as possible.
There are many different types of glasses. For clarity, we decided to choose a very simple and standard wine glass, the appearance of which is probably familiar to everyone.

How to draw a wine glass step by step
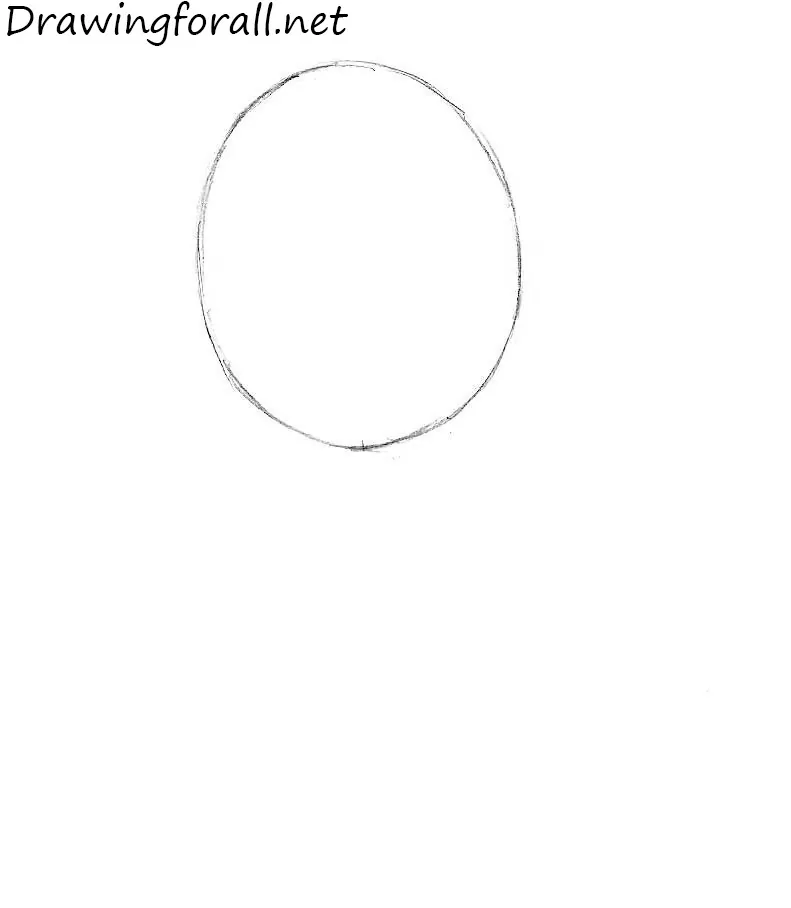
Step 1 – Sketch the bowl shape
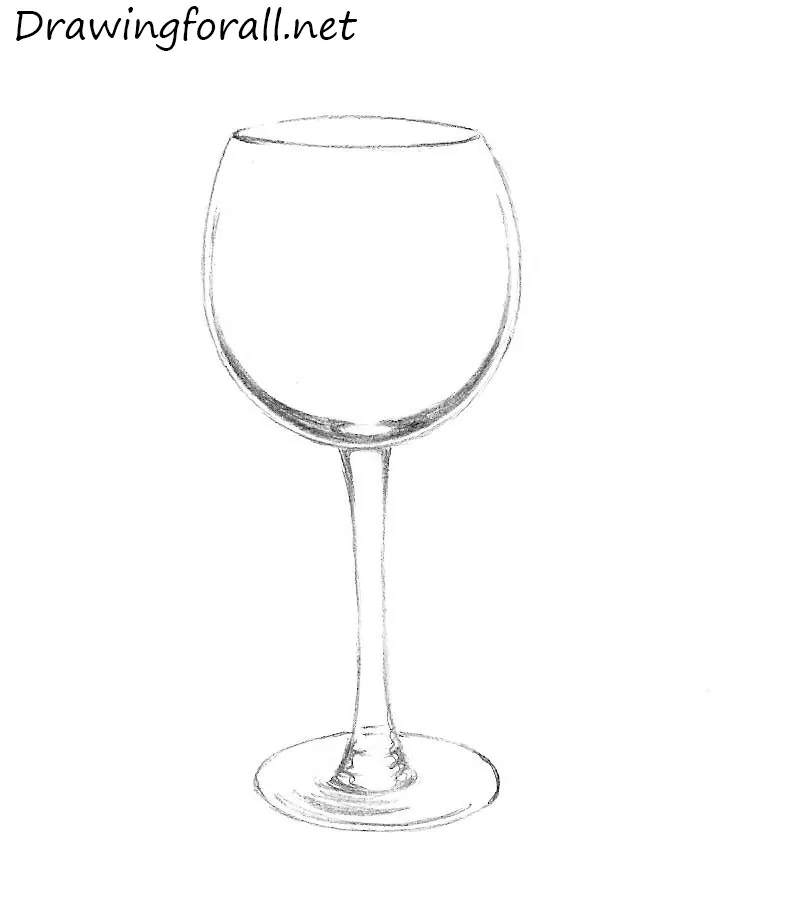
First, draw an oval on a paper for the bowl of the wine glass. The resulting shape should resemble an egg. Draw this shape very smoothly and carefully. For symmetry, you can lightly mark a vertical centerline through the oval. Keep your pencil pressure light so you can adjust the curve without grooves in the paper.
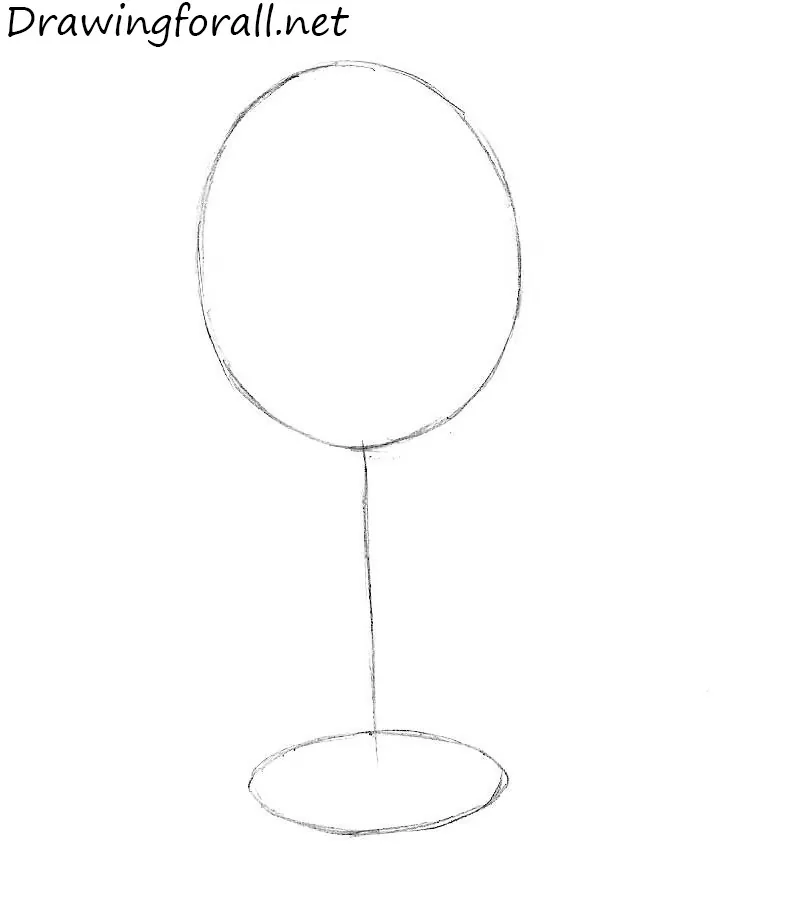
Step 2 – Draw the stem guide and base ellipse
Now you can draw a line extending from the center of the bottom of the oval. At the very end of the line, draw a horizontally flattened ellipse for the base of the wine glass, as in our illustration. Use the vertical line as the axis of symmetry. Make the base ellipse narrower than the bowl so the footprint.
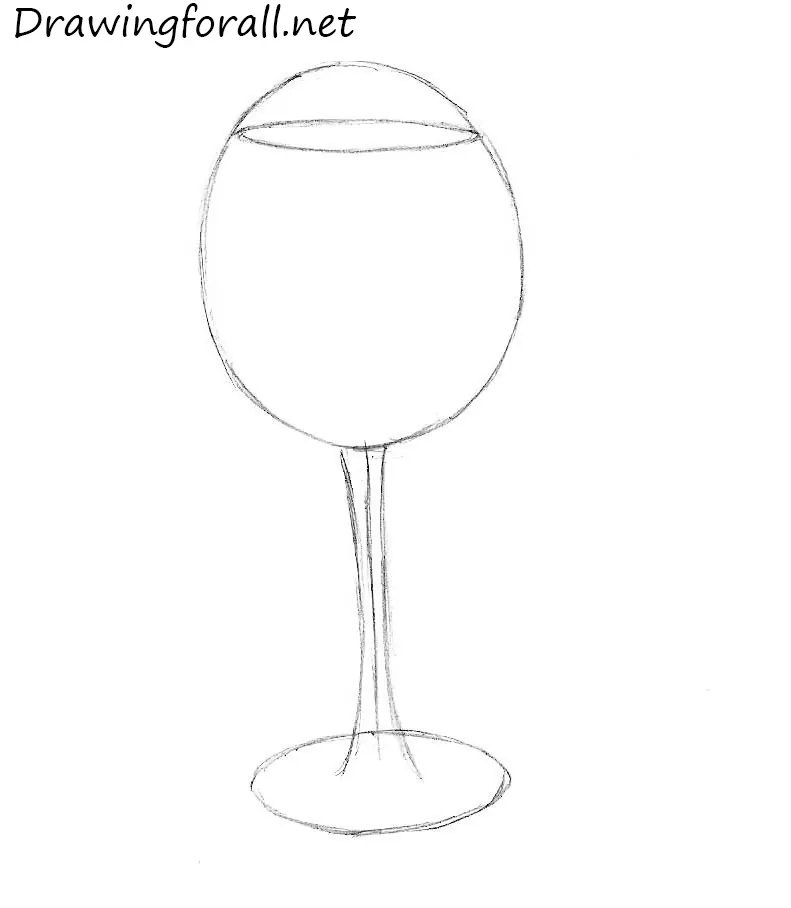
Step 3 – Define the glass stem and rim ellipse
Outline the stem of the wine glass. It should be thin and elegant. Inside the upper part of the oval, add another small ellipse to create the opening of the glass. Taper the stem gently toward the middle, then widen into the foot. Keep the inner ellipse parallel to the outer rim to imply glass thickness.
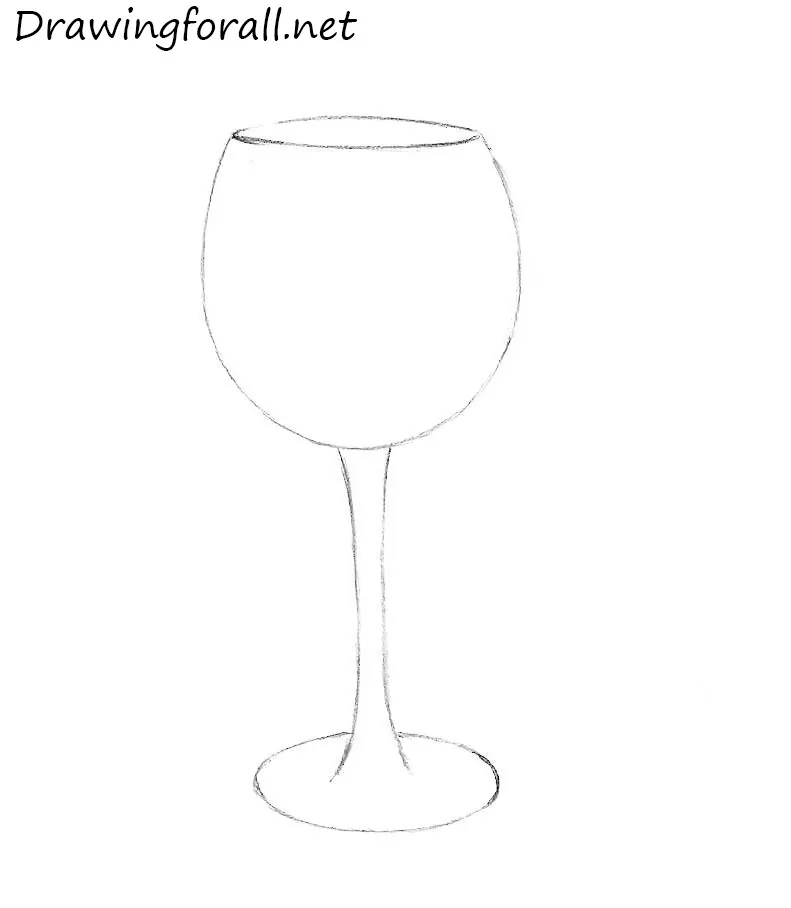
Step 4 – Clean up the wine glass drawing
It is the easiest step of this wine glass drawing tutorial. With the help of an eraser, just delete the guidelines, and make the necessary lines of the sketch smooth and clean. After these actions, you will get something like the drawing, presented in our illustration. Unify long curves with single, continuous strokes. If one side looks heavier, trim line weight to match the opposite side.
Step 5 – Add reflections for a glassy effect
Add some shadows and highlights to the wine glass sketch. To check proportions, look at your sketch in a mirror. You can keep the brightest highlight as a clean vertical strip on the bowl, darken edges slightly, and place a soft cast shadow under the base. If the result is close to the example, you have completed the work correctly.
A drinking glass has existed for centuries, and there are countless variations by beverage and by region. You can reflect that in your drawing by giving the glass different forms.
For example, swap rounded contours for straight lines to represent a martini glass, make the bowl taller or shorter, adjust the stem to be thicker or thinner, longer or shorter, and choose a base that is wide, narrow, or shaped.
These choices work for wine glasses, goblets, champagne flutes, and other stemware.
The main rule is symmetry. The left and right sides must mirror each other across a clear vertical axis. Keep the rim and base ellipses aligned, maintain even curvature on both sides of the bowl and stem, and check proportions so the silhouette reads correctly in perspective.
Reflections and highlights define whether the glass looks convincing. A perfectly symmetric outline with misplaced highlights will still look wrong.
Place specular highlights and soft reflections according to the light source, and follow the curvature of the rim, bowl, stem, and foot. Suggest transparency and a hint of refraction without overworking the lines. To learn more, check out our light and shadow article.
A glass is also a strong addition to a still life or a portrait. As a next step, draw a still life with stemware, or sketch a person holding a glass to practice more complex composition, balance, and believable lighting.
You can also sketch a background or place other still life objects beside the glass. For example, you can draw a vase, bottles, or utensils, to create a more complete composition.
If your wine glass sketch did not come out exactly like the illustration, do not be discouraged. Every attempt builds skill.
Erase lines, correct mistakes, and redraw as many times as necessary. With practice, your hand will become more confident and the shapes more precise.
So, this was an easy wine glass drawing tutorial, and we hope this lesson was not only interesting but also useful, and that you learned something new in the process.
We also hope that it turned out to be simple and clear for you.


Do you do step by step in coloured pencils please
In the future we plan to create tutorials with coloured pencils. But at the moment we have a huge number of unpublished drawing lessons with black pencils. So, stay tuned.
cool where are they
he is
like you
Yes you do
This is a good way to teach children the basics of drawing. Good job. I’m going to try is with children. Never mind the negative people. They don’t have to look at this.
Really appreciate that. Glad it can be useful for teaching kids.
Bro cooked😎😎
Don’t worry, practice will make it easier next time.