How to Draw a Cossack
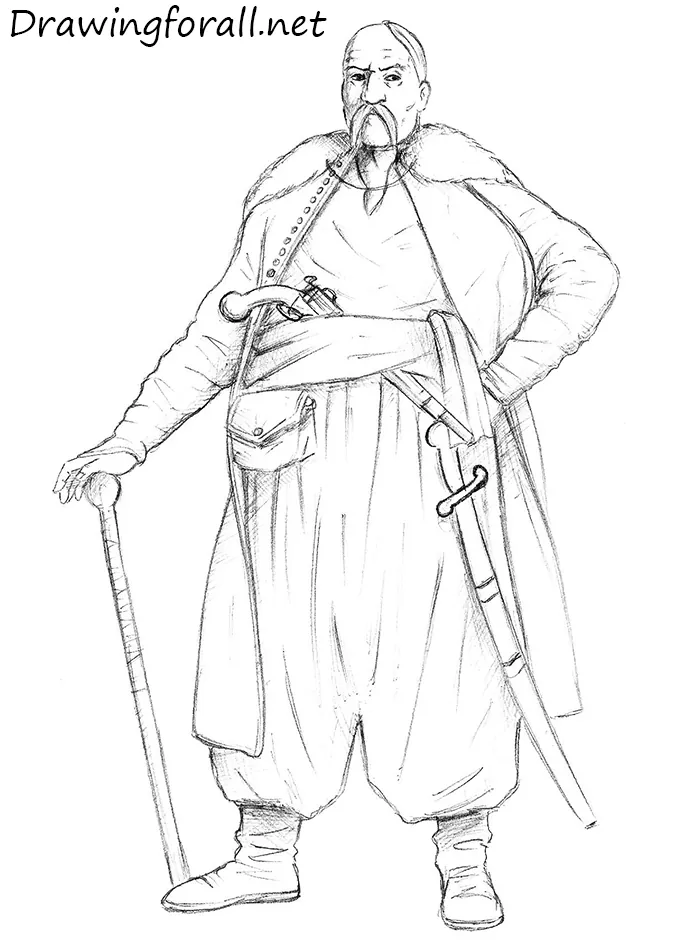
This tutorial is dedicated to the legendary warrior, one of the most recognizable military figures of Eastern Europe during the early modern period, and will show you how to draw a Cossack step by step.
The Cossacks formed groups and communities whose leaders were elected at meetings where every vote was taken into account.
How to draw a Cossack step by step
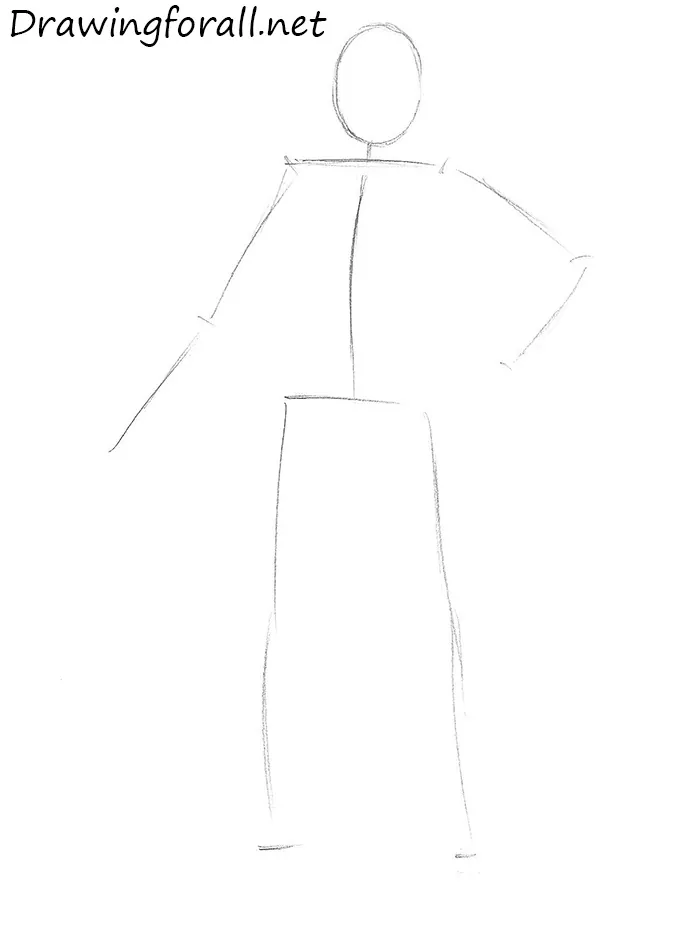
Step 1: Sketch the Cossack’s pose
As in our other drawing tutorials, begin with a stick figure made of lines and circles. It will help establish the Cossack’s position, body structure, and placement on the paper. Note that his figure is stocky and slightly short. According to drawing textbooks, the ideal male figure is approximately seven head lengths tall, but this figure is closer to six. Another useful rule is that the arms reach approximately halfway between the waist and knees. Also pay attention to the curved line of the spine, which makes the Cossack’s pose look majestic and imposing.
Step 2: Add volume to the warrior’s body
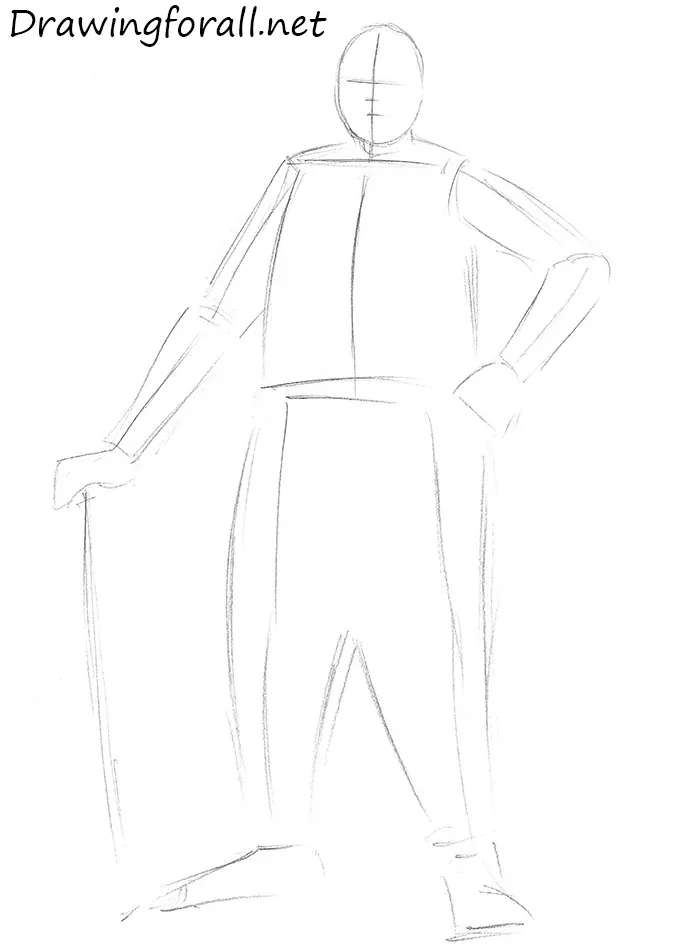
Add volume to the body of the Cossack. Draw a vertical facial symmetry line that divides the face into two equal parts, although it should appear slightly shifted to the left because of the position of the head. Cross it with three horizontal lines. The upper line marks the position of the eyes. Immediately below it, add short lines for the nose and mouth.
Now work on the Cossack’s body. Sketch the torso as a large cylinder and the arms as elongated cylinders. Outline the legs inside the wide trousers. Also sketch the hands, feet, and staff.
Step 3: Outline the warrior’s facial features
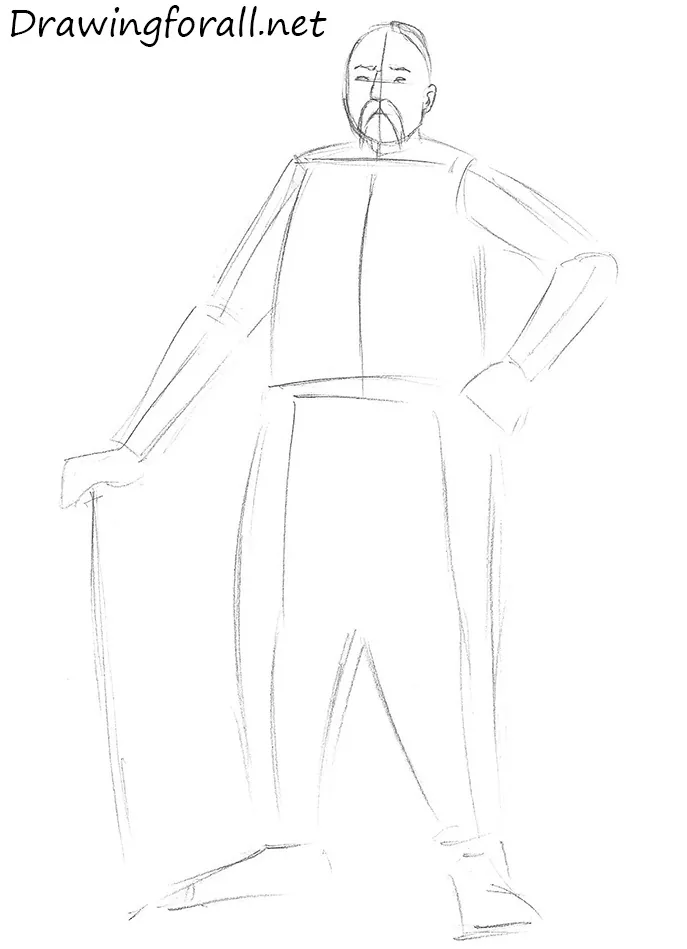
Using the guidelines from the previous step, outline the main features of the Cossack’s face. His head should be slightly raised, making the warrior look proud and imposing. Draw the eyes as almond-shaped forms and add the eyebrows with curved, dark lines. Use the vertical guideline to place the nose. Then draw the hanging mustache and the tuft of hair on his shaved head.
Step 4: Draw the Cossack’s face
Refine the Cossack’s face. Add short, slightly curved horizontal wrinkles, mainly across the forehead and beneath the lower eyelids. Place a few additional wrinkles near the temple. Draw the nostrils of the large nose, mark the cheekbones, and detail the facial hair, including the long mustache and braided lock. Draw both types of hair from the roots toward the ends.
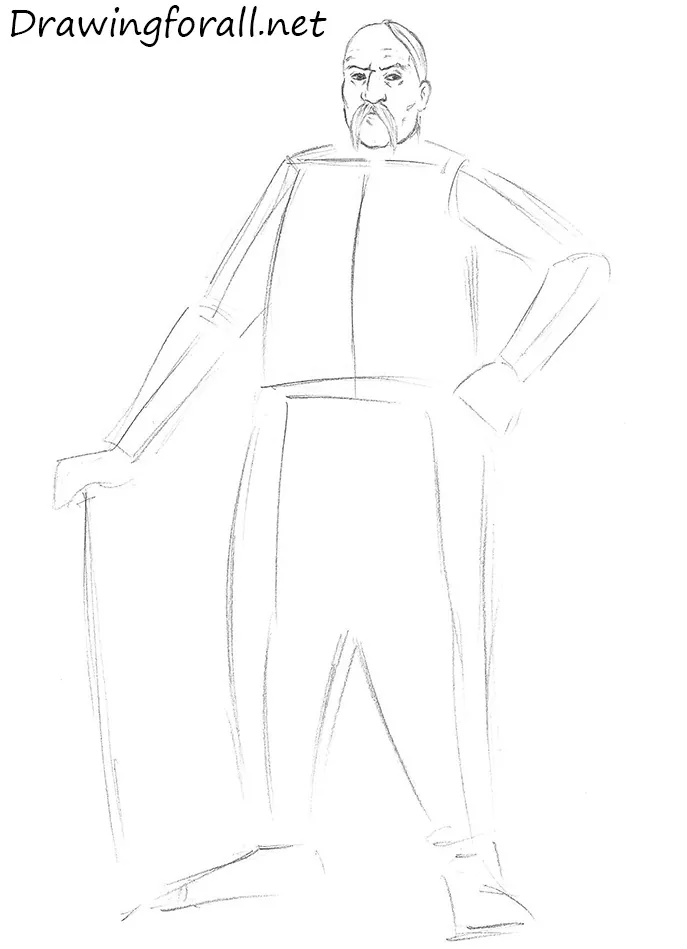
Step 5: Mark the clothing and weapons
Mark the torso of the Cossack. Outline the fur cape across his shoulders using two geometric shapes: a rectangle on the left and a triangle on the right. Make these shapes slope downward from the head toward the shoulders. Draw the open edges of the upper garment. Use several rough lines to sketch the belt and the weapon with a very long barrel, unlike the short firearm used when drawing Nick Fury.
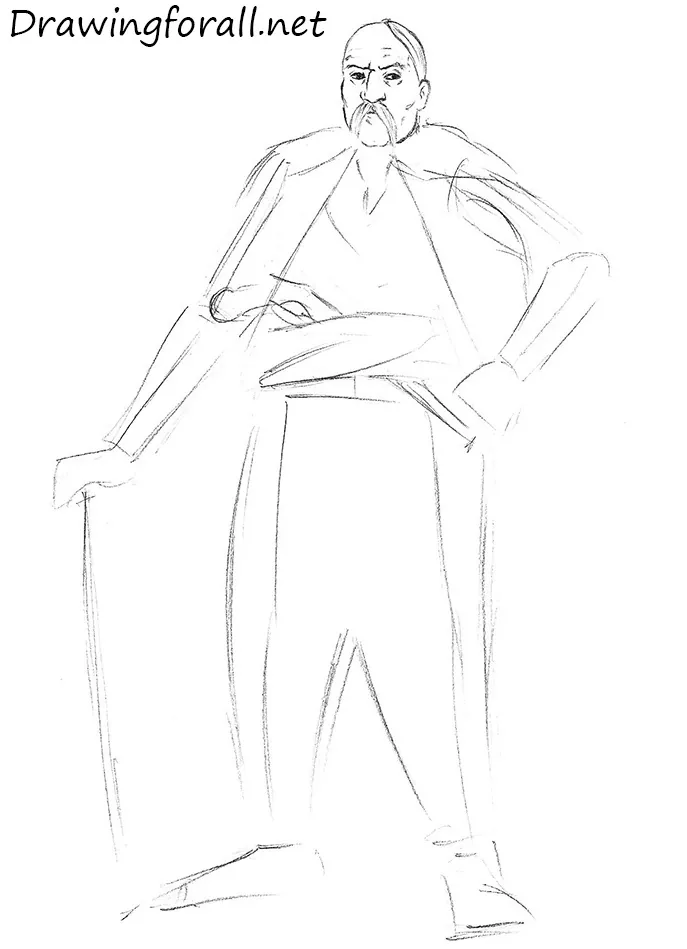
Step 6: Detail the coat and weapon
Add details to the Cossack’s clothing and weapons. Draw the rough, furry edges of the cape and add small round buttons in a vertical row. In the center of the body, outline the clothing folds with slightly curved lines. Refine the contours of the Cossack’s left arm and add horizontal folds of varying depth. Erase the unnecessary guidelines. Finish by detailing the ancient firearm and the loosely tied hanging belt.
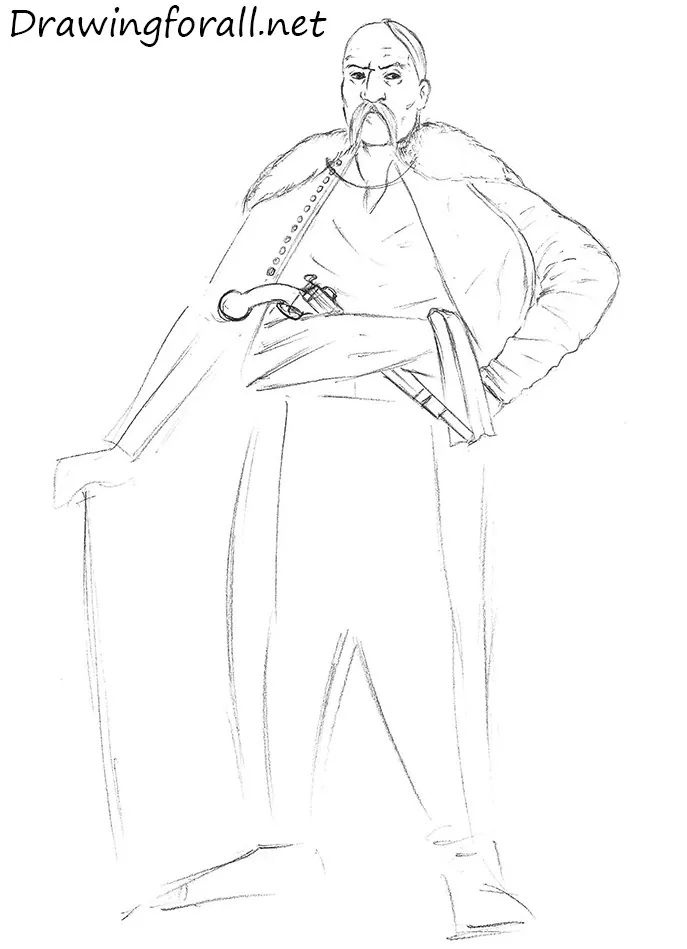
Step 7: Refine the warrior’s right hand
Work on the Cossack’s right arm. As in the previous step, erase the extra guidelines, refine the sleeve contour, and draw the folds. Note that these folds make the sleeve edges more uneven. The hand rests on a sturdy staff. Draw the finger joints and add the thumbnail.
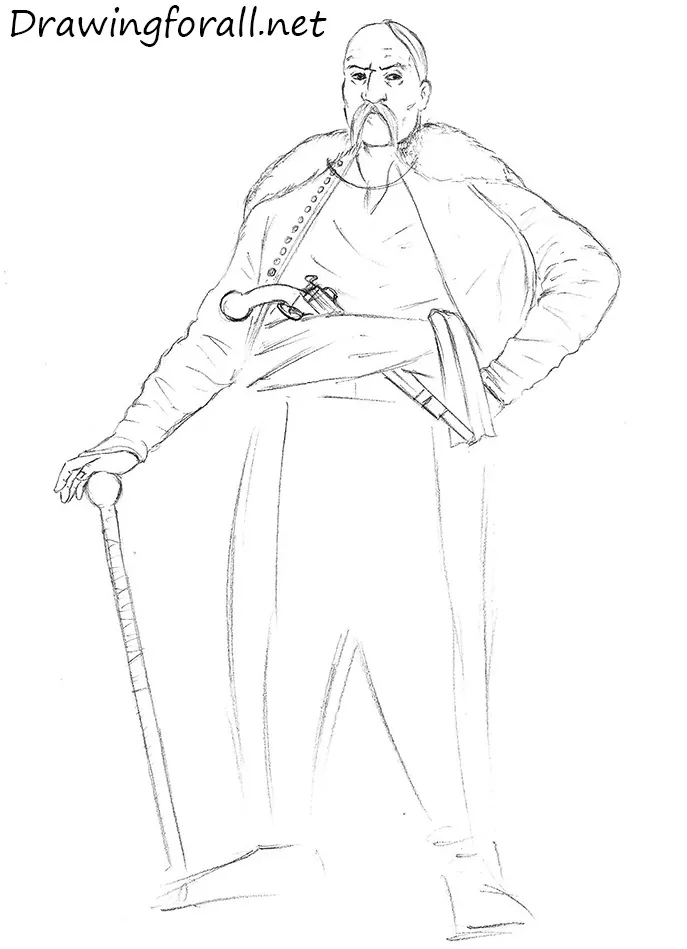
Step 8: Detail the right leg
Add details to the Cossack’s right leg and wide traditional trousers. The pants are very loose and baggy. Instead, focus on the fabric folds. Draw the pocket directly below the belt, then add its button and several folds. Refine the trouser contours and erase the unnecessary guidelines. Use long vertical lines to draw the folds. On the visible section of the boot, mark both the inner leather folds with oblique lines and the outer folds that make the contour uneven.
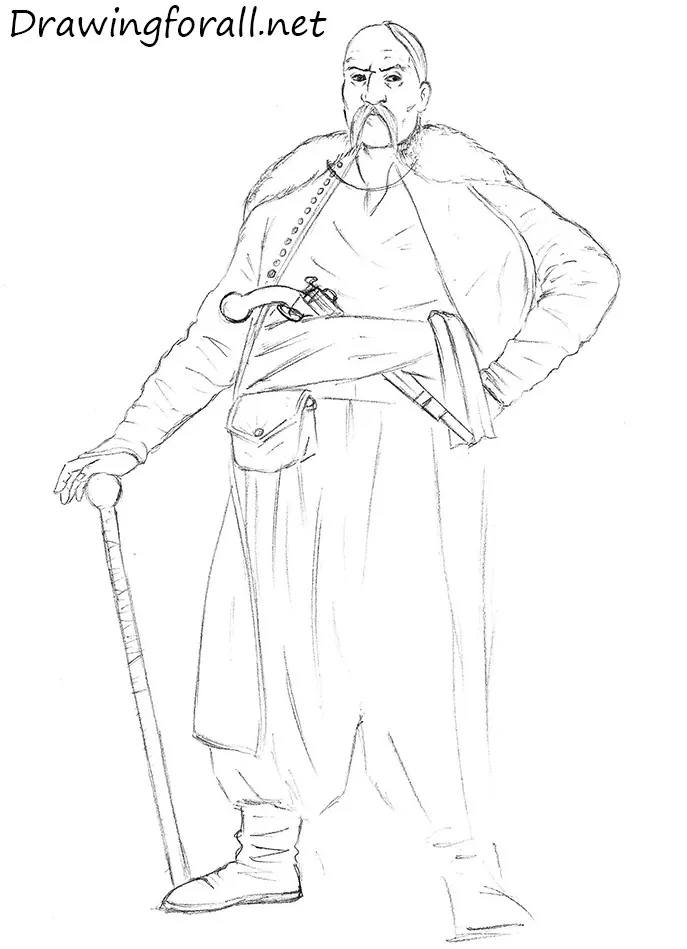
Step 9: Complete the left leg
Move to the Cossack’s left leg and repeat the previous process. Erase the extra lines and refine the contours of the trousers. Use long vertical lines to add the folds. The main difference is the long sword called a shashka. The shashka should be long and slightly curved. Draw the boot in the same way as the previous one.
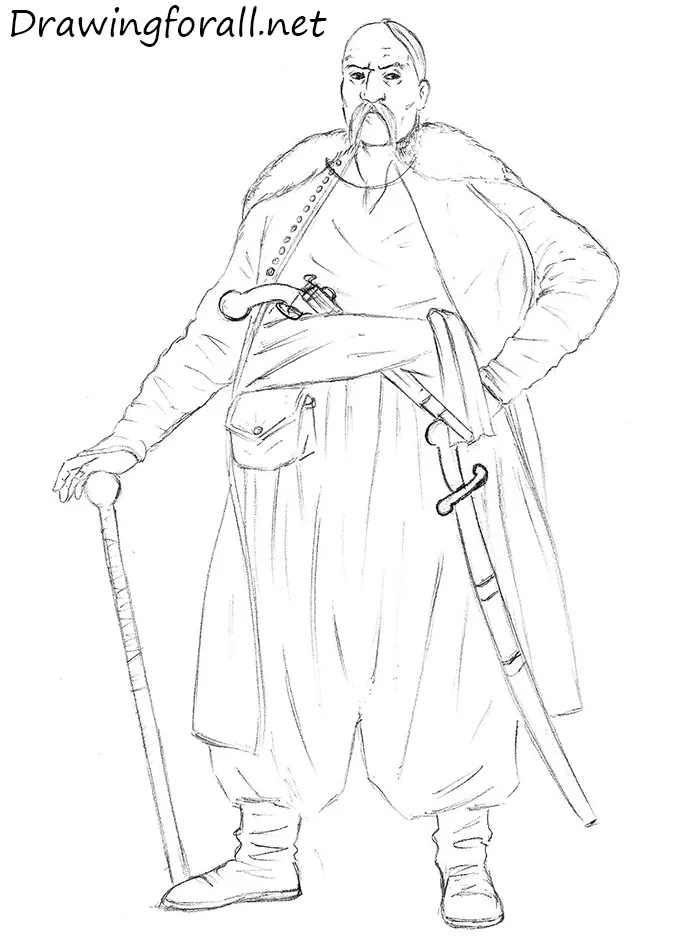
Step 10: Add light crosshatched shadows
The Cossack drawing is almost complete, and only the shadows remain. Keep them very light. First, determine the position of the light source, then apply hatching to the areas where the light does not reach. In slightly darker areas, add a second layer of hatching at a crossing angle.
This tutorial showed you how to draw a Cossack. To continue practicing historical warriors, try drawing a samurai, one of the most famous military figures in Japanese history.
You can also practice drawing a scimitar, a curved sword closely associated with many warriors of the Middle East and Eastern Europe.