

How to Draw a Gremlin
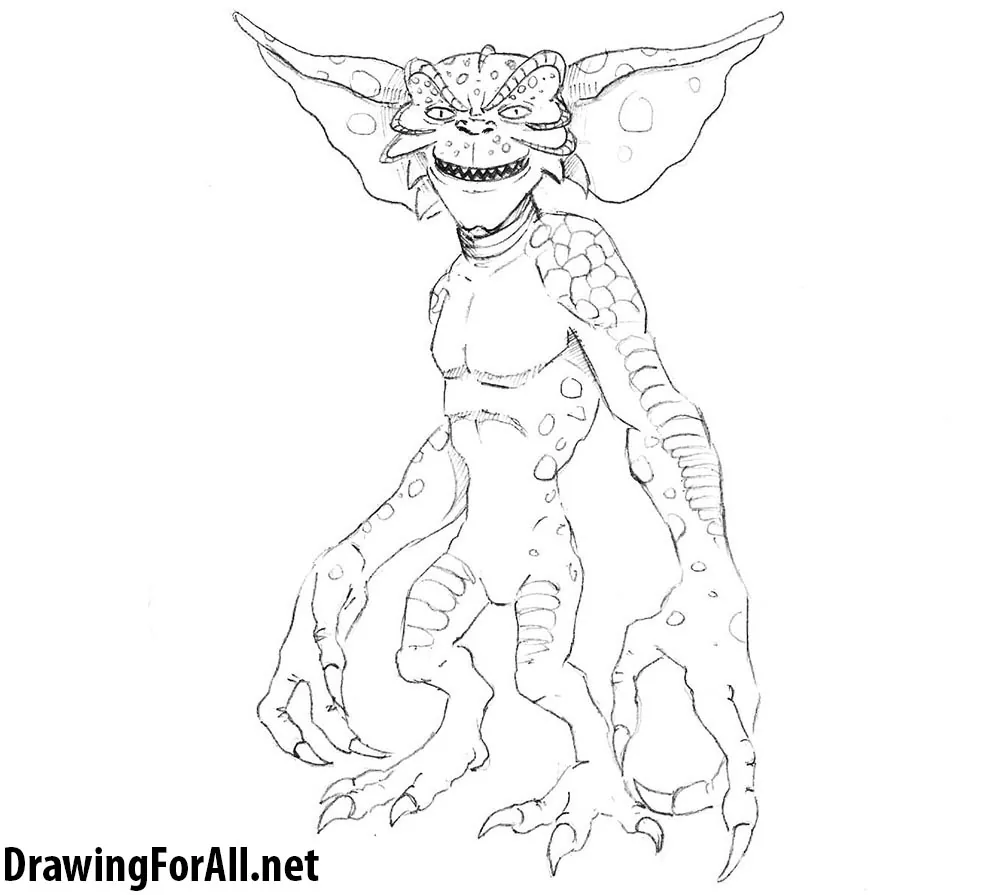
In this tutorial, we will show you how to draw a gremlin – a very interesting character from old stories and classic movies.
How to draw a gremlin step by step
Step 1
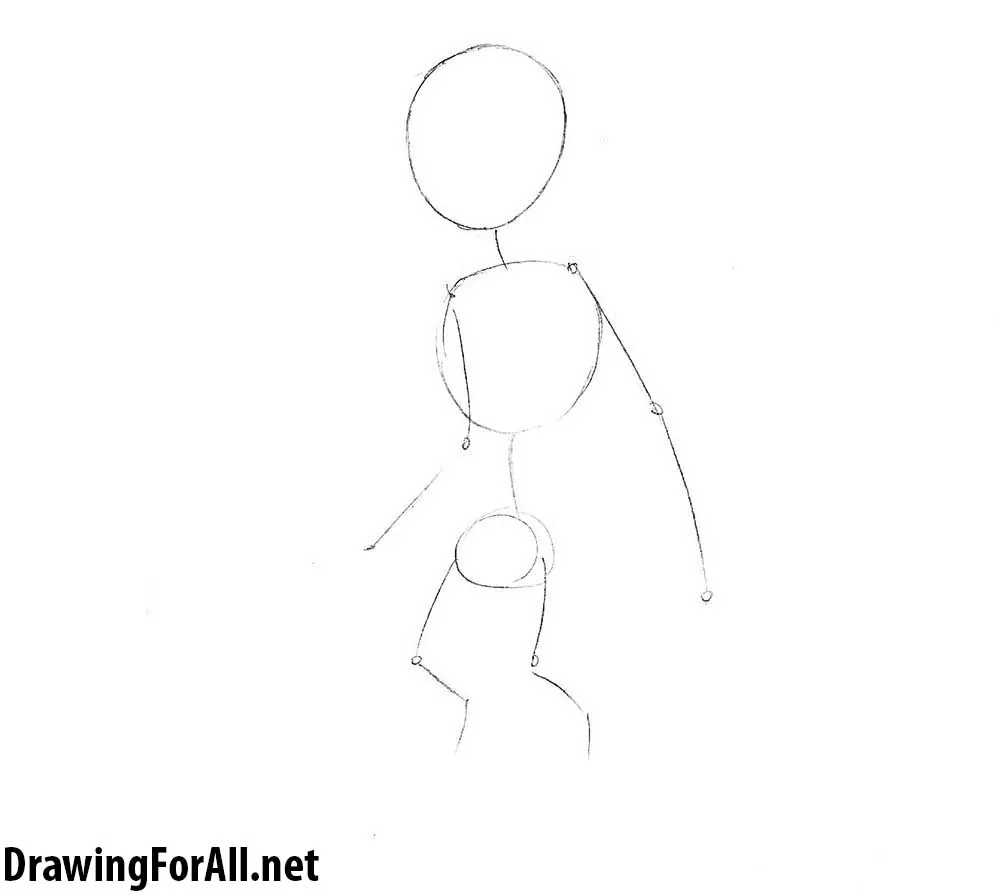
Start with a stick figure. Sketch the head, chest, and pelvis with circles. Then draw the arms, spine, and legs with simple lines. Note that the head is much larger than that of an ordinary person.
Another difference from the human figure is the unusual relationship between the limbs: the arms are very long, while the legs are short. This is somewhat similar to a monkey.
Step 2
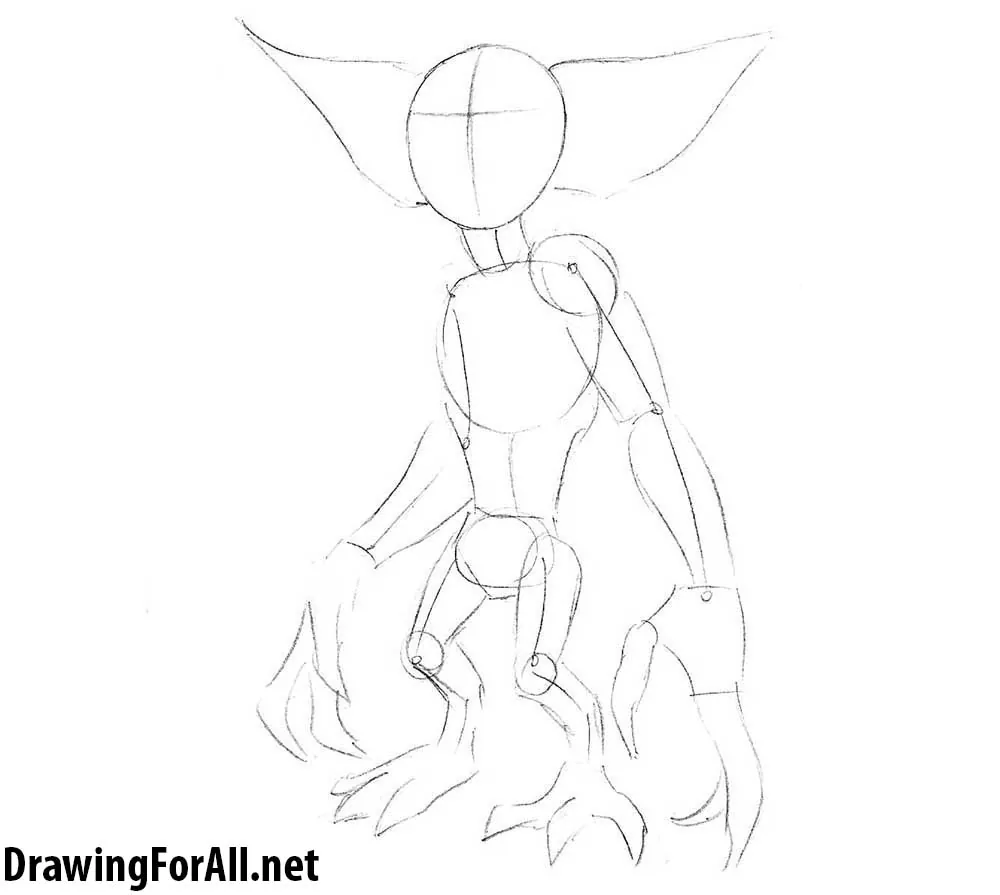
Draw the outlines of the large ears. On the face, mark the center line and a horizontal guideline for the eyes. Outline the arms with narrow cylinders and draw the hands, which at this stage resemble the hands of zombies from Half-Life. Connect the circles of the chest and pelvis. Draw the legs in the same way as the arms.
Step 3: Sketch the facial features
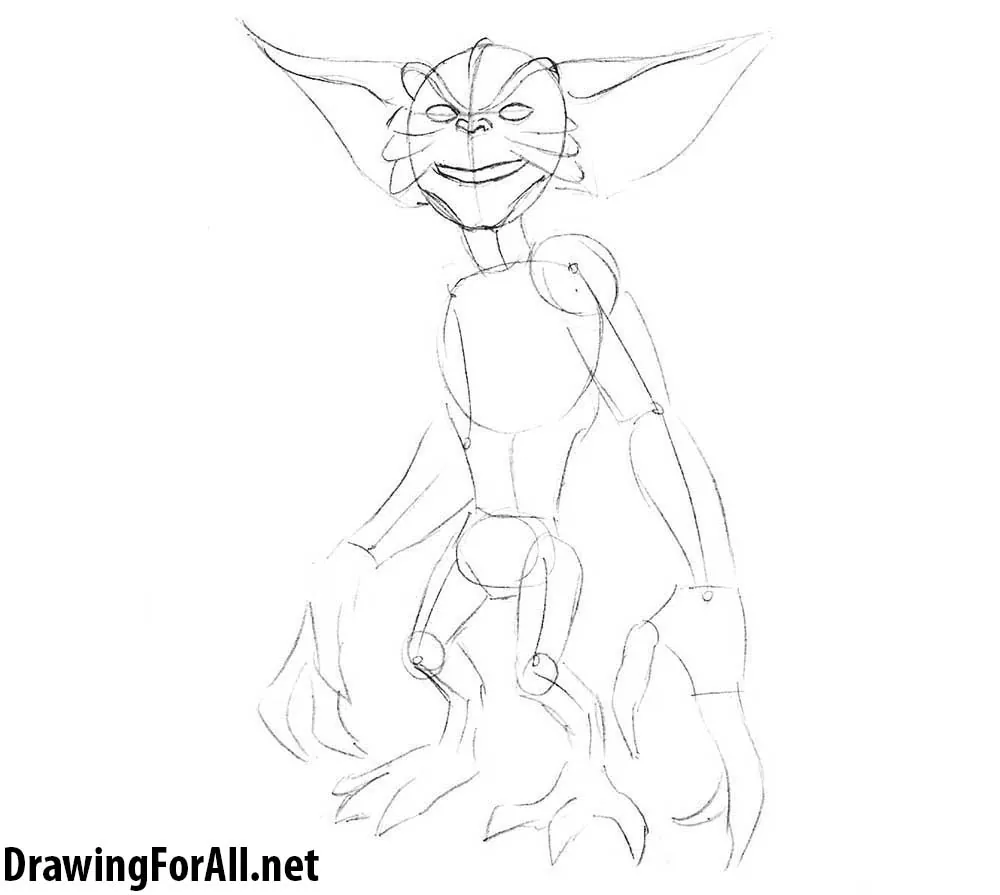
Outline the main facial features. Create the gremlin’s distinctive expression with lowered eyebrows and a smiling mouth. Next, draw the prominent cheekbones extending from the eyes toward the mouth.
Do not forget the small, flat nose positioned close to the eyes.
Step 4: Refine the gremlin’s face
Refine the facial details. If the previous steps were completed correctly, this stage should not be difficult. First, trace the facial lines and give them their final shape. Make the outlines of the ears more irregular and wavy.
Draw small pupils inside the eyes, add the teeth, and sketch several wrinkles across the face. Then erase the remaining guidelines.
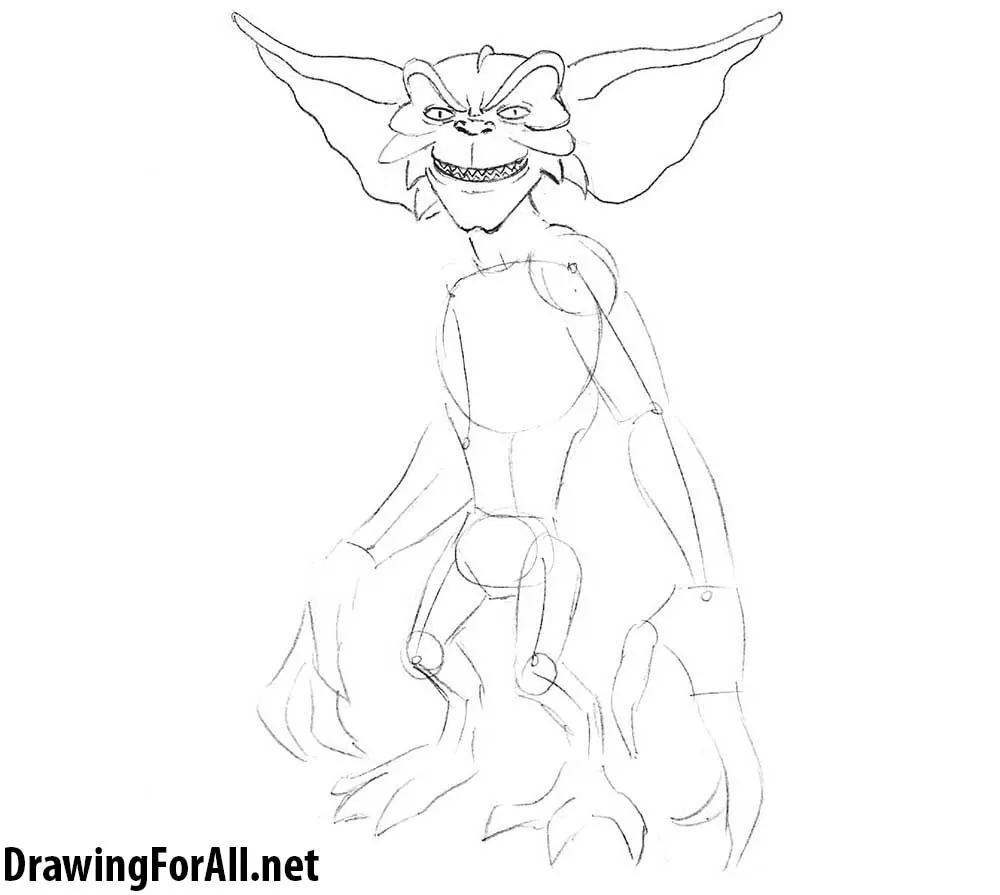
Step 5: Define the gremlin’s body
Now refine the gremlin’s body. Using the circles and cylinders from the previous steps, give the torso its final shape. Start with the torso, adding the pectoral muscles, then refine the arms and legs. Finish by outlining the hands and feet, including the knuckles.
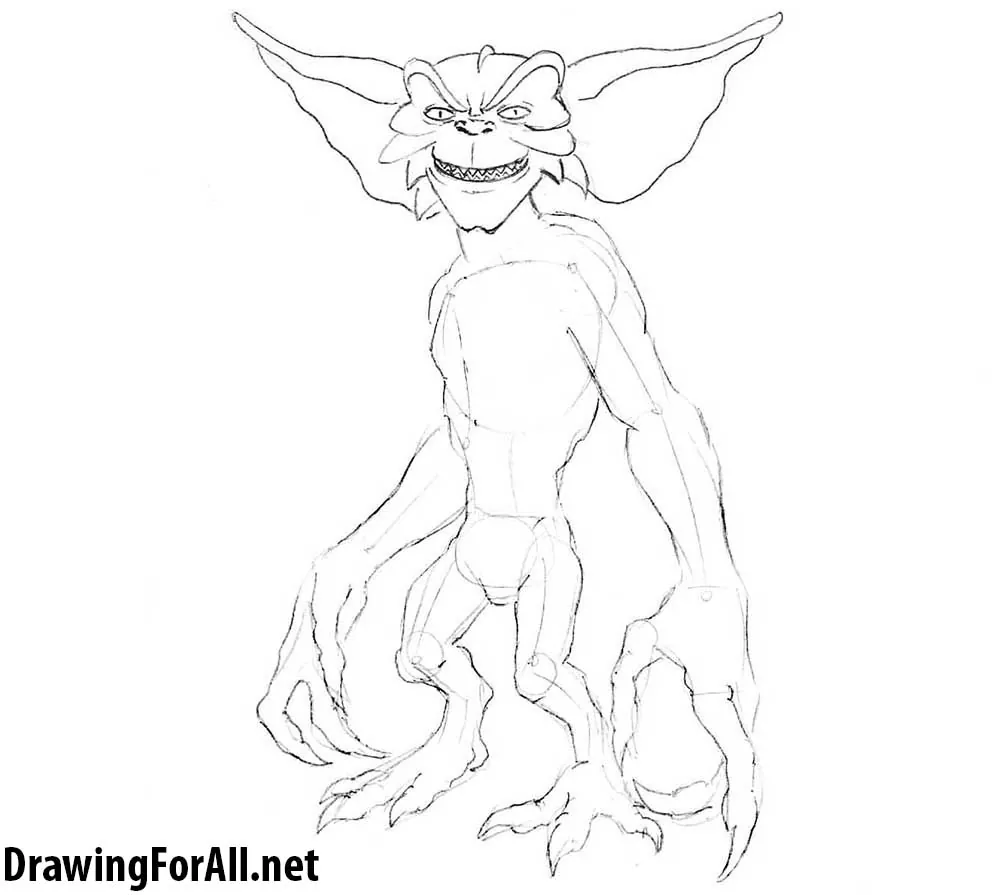
Step 6: Clean the body outlines
Erase all unnecessary guidelines from the gremlin’s body and refine the outlines of the torso, arms, and legs.
Draw the neck folds, pectoral muscles, and abdominal muscles. Refine the deltoids, biceps, forearms, and leg muscles. Finish by adding the claws to the hands and feet.
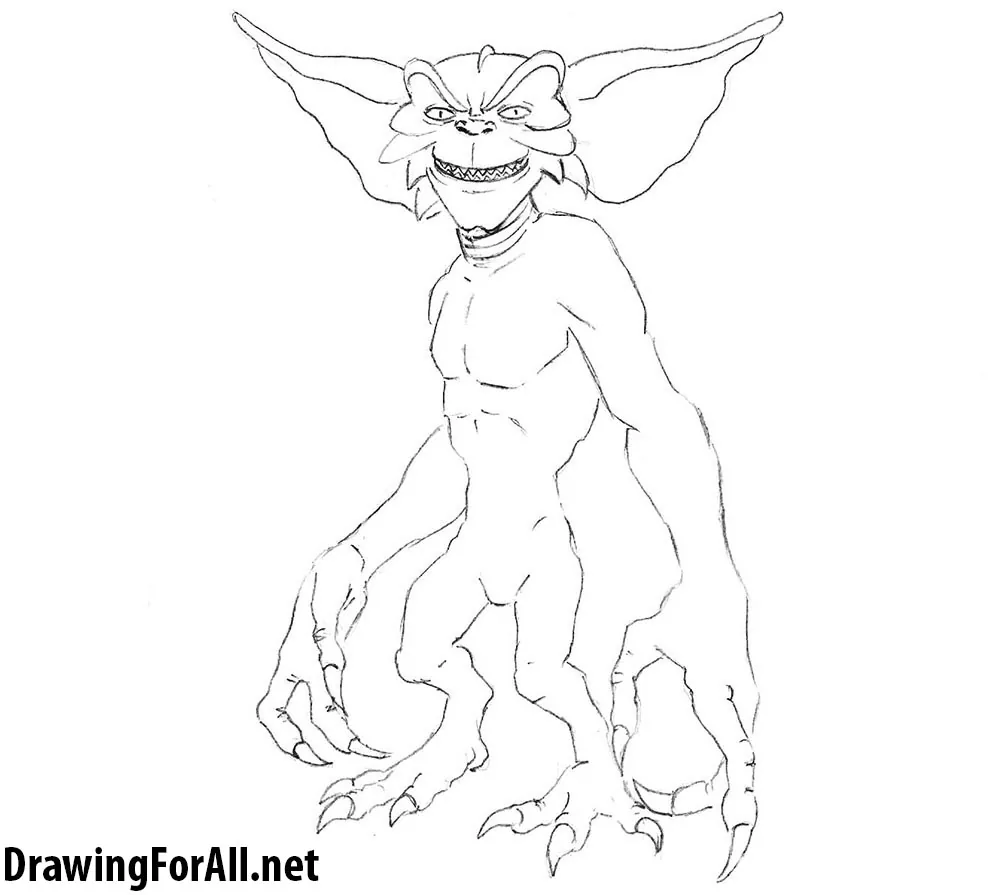
Step 7: Add the final details
Complete the gremlin by adding the finishing details and shadows. This version is only one example, so feel free to customize your character. You can add hair, create more or fewer spots on the skin, or leave the design as it appeared in the previous step.
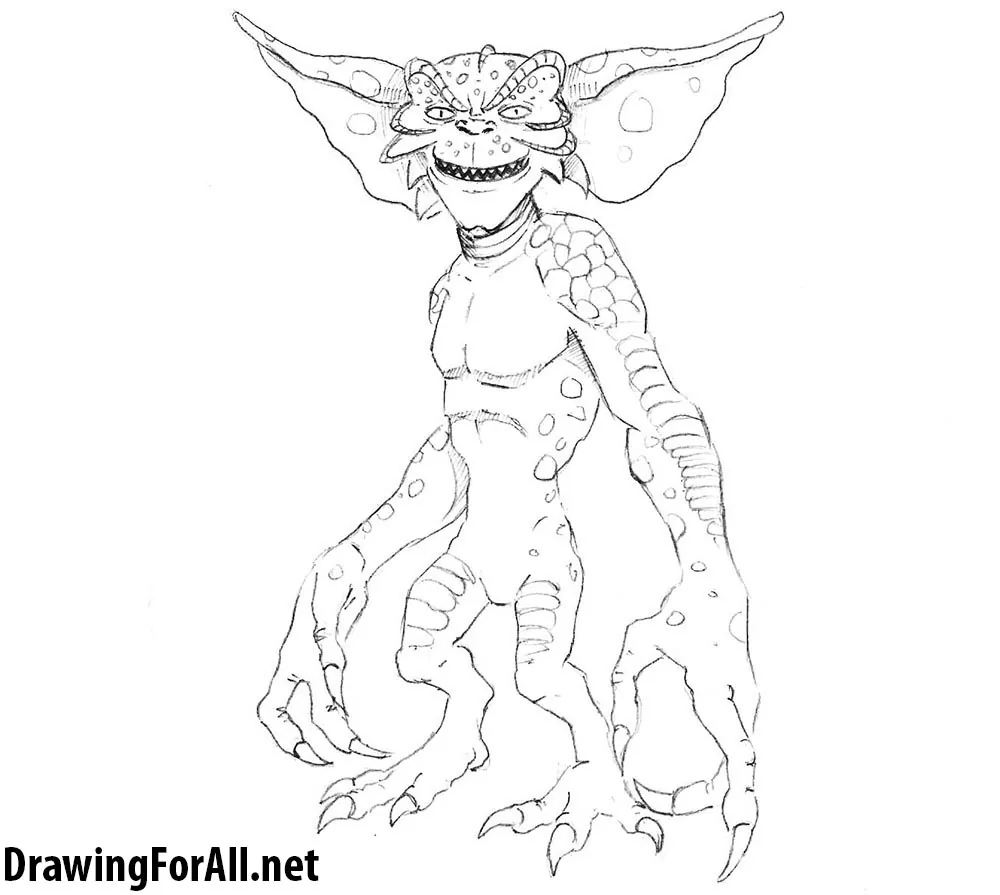
We hope this tutorial helped you learn how to draw a gremlin. Practice the steps a few more times, experiment with different facial expressions and details, and try creating your own version of this classic creature. Be sure to explore our other character drawing tutorials for more practice.



Can you make a tutorial on how to draw a Skeksis from the Dark Crystal?
Thank You! I love your site.