How to Draw Mushrooms
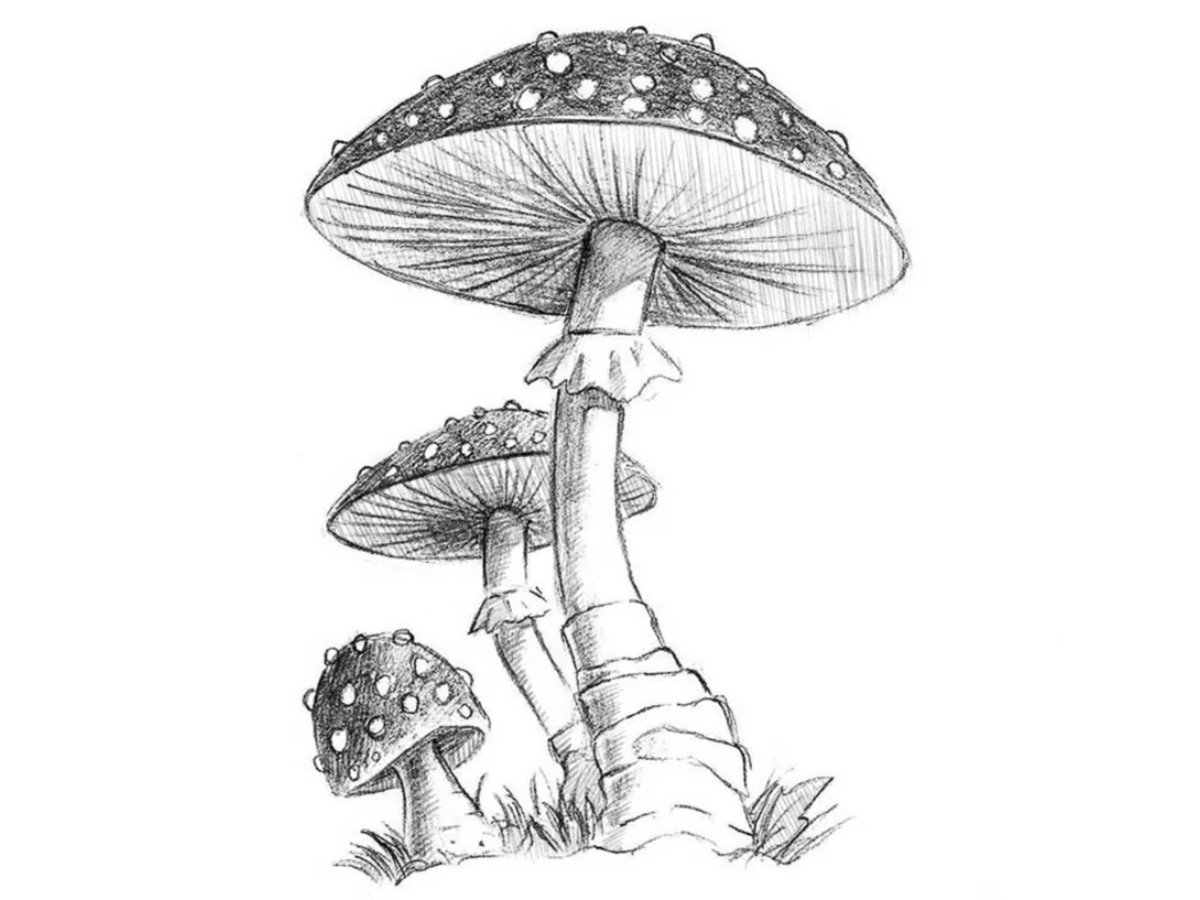
In this drawing tutorial, we will show you how to draw mushrooms – objects that combine the characteristics of animals and plants.
Mushrooms come in many different types, but almost all have the same structure. With the help of this step-by-step tutorial, you can draw any mushrooms.
How to draw mushrooms step by step
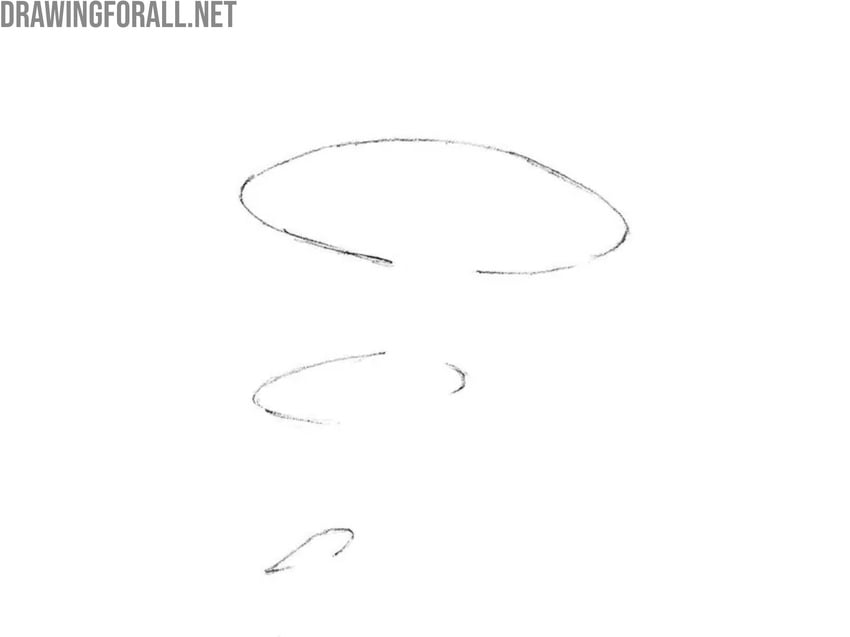
Step 1: Sketch the basic shape of the first mushroom
To draw mushrooms correctly and accurately, start by outlining the basic shapes from top to bottom. Begin by roughly sketching the outline of the cap of the mushroom that is closest to the viewer, using very light and smooth lines.

Step 2: Draw smaller mushroom caps
If you’re drawing several mushrooms, as in our example, add a few more outlines of smaller caps placed slightly lower than the first one. This will help show perspective and the size relationship between them. Vary the tilt and placement of the caps to make the composition look more natural.
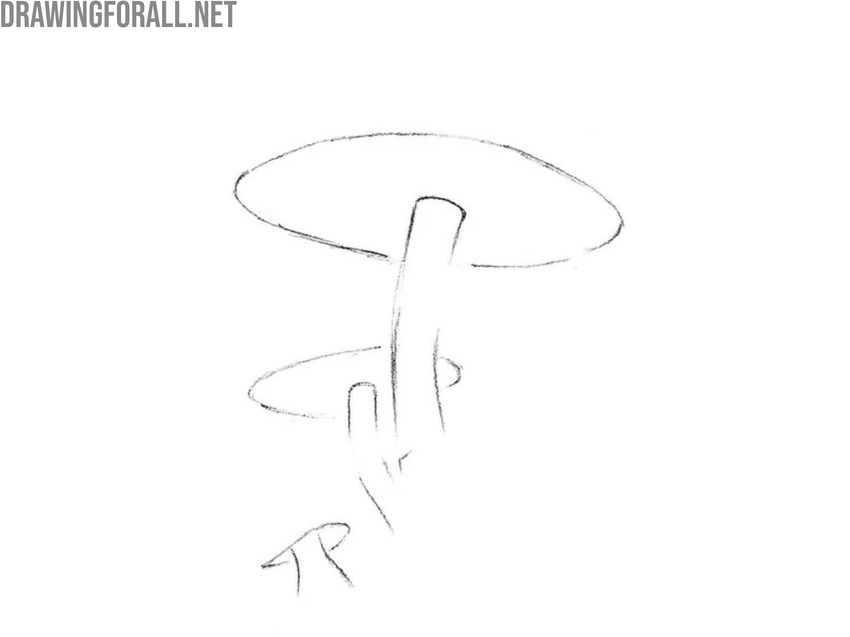
Step 3: Sketch the stems under each cap
Now, using smooth and light strokes, roughly sketch the stems of the mushrooms, also varying their curves and lengths. Don’t focus on precision at this stage, because this step is meant to establish the general composition and proportions.
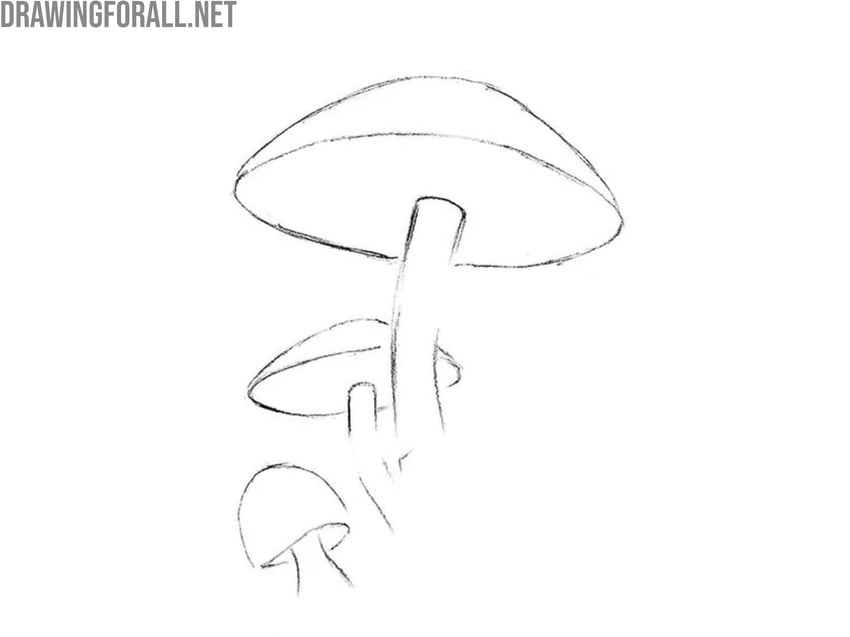
Step 4: Draw the upper edges of the mushrooms
Give the mushrooms sketch a more recognizable shape by outlining the upper edges of the caps with smooth, light lines above the ovals drawn in the previous steps. To make the drawing more convincing, slightly vary the thickness and volume of each cap.
Step 5: Add lower details and surrounding elements
It’s time to start adding details, but continue using light lines so that you can easily make corrections as you work. Lightly sketch the details on the lower parts of the mushrooms and sketch the grass and small stones near the base of the stems.
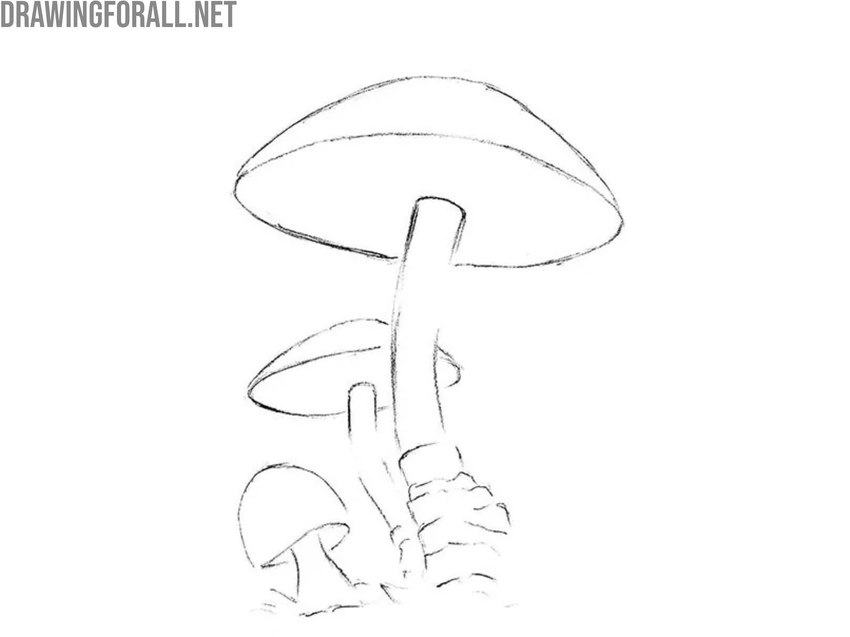
Step 6: Draw the small dots on the mushroom caps
Mushrooms come in many shapes, sizes, and variations, each with distinct features and cap patterns. In our example, the caps have small dots on their upper surfaces, so lightly mark their placement with thin lines. At this stage, also check your mushroom sketch for correct proportions and symmetry.
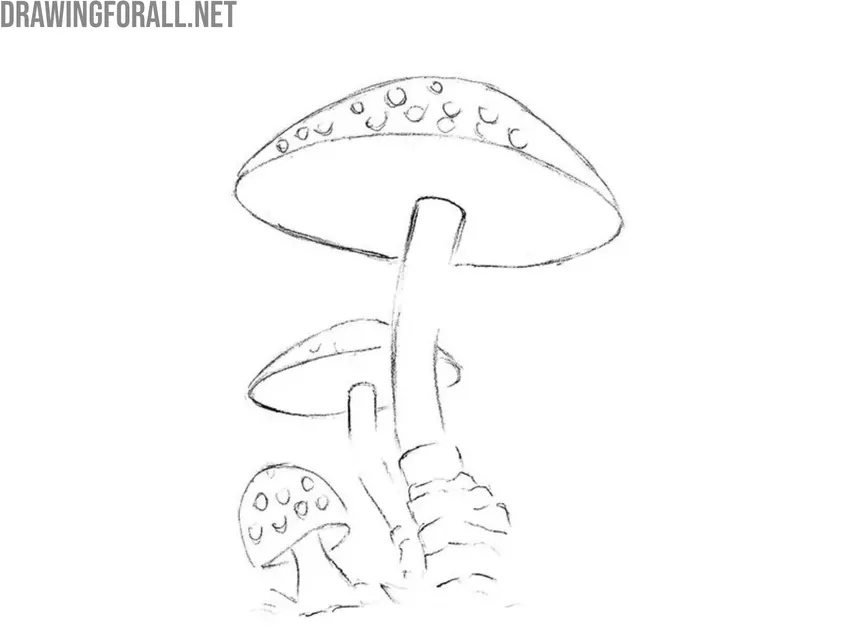
Step 7: Draw the gills of the mushrooms
Now begin refining the lower parts of the mushrooms using the preliminary outlines as a guide. First, sketch fine lines under the caps of the mushrooms to represent the gills, radiating from the center toward the edges. Then, add subtle vertical lines on the stems to suggest surface texture and volume.
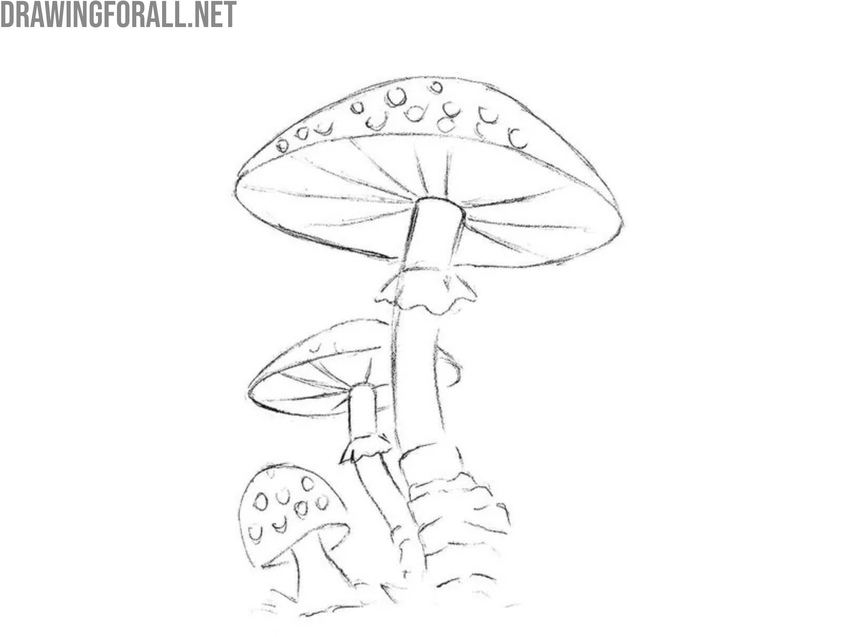
Step 8: Darken the outlines and refine the shapes
From this point, start using darker and more confident lines to gradually give the drawing of mushrooms a finished look. At the same time, erase unnecessary construction lines. Begin by refining the caps, making their shapes clean, rounded, and dimensional. Then, add more gill lines under the caps, keeping them evenly spaced for a natural appearance.
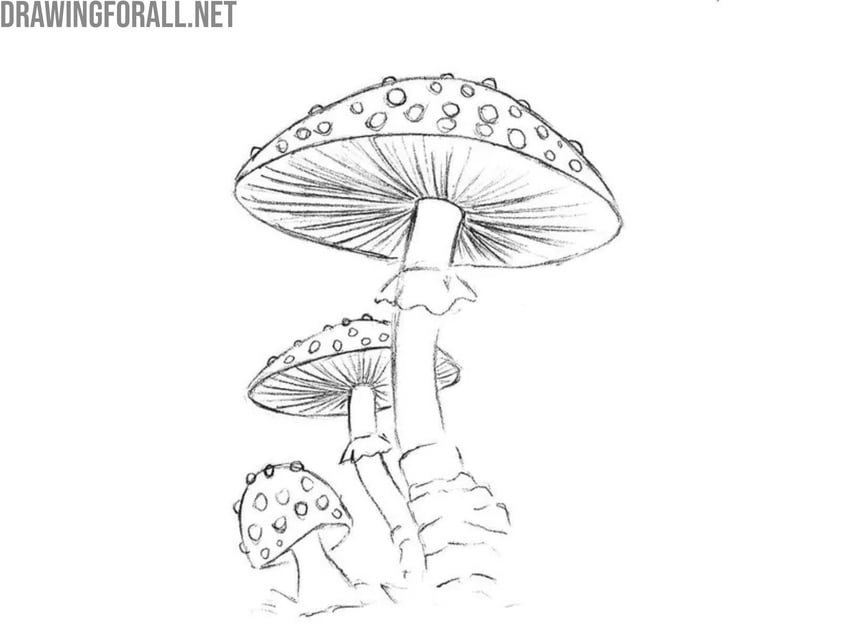
Step 9: Draw grass below the mushrooms
Erase all remaining guidelines from your mushroom drawing, leaving only clean, sharp outlines. Add extra details to the lower parts, such as grass and stones, to enhance realism. Check symmetry and proportions, making any needed adjustments to achieve accuracy.
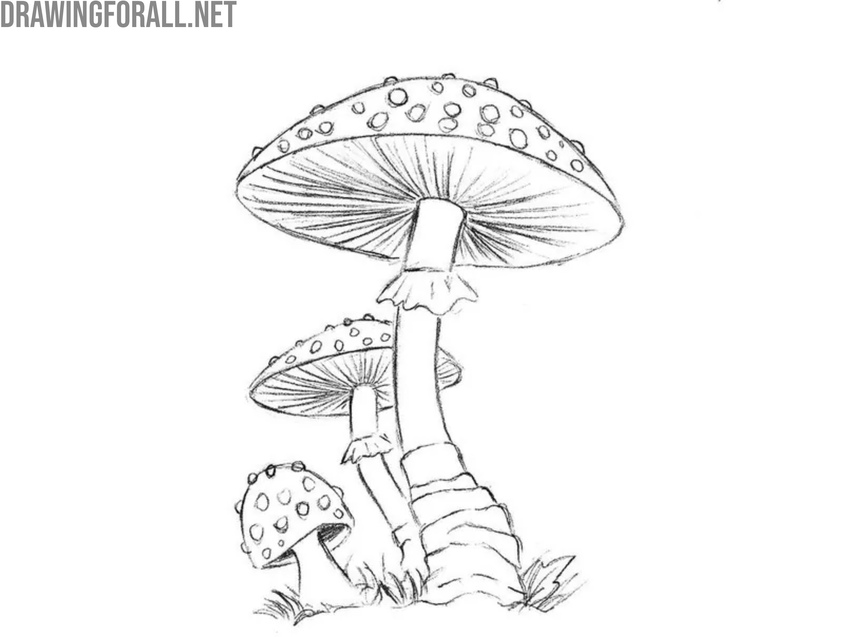
Step 10: Add shadows with smooth hatching
To give your drawing a realistic, three-dimensional look, add shadows using smooth and even hatching. First, paint the caps, using smooth and uniform hatching. Then hatch the lower parts of the caps, to represent shadows. Next, with the help of simple hatching, add shadows to the stems.
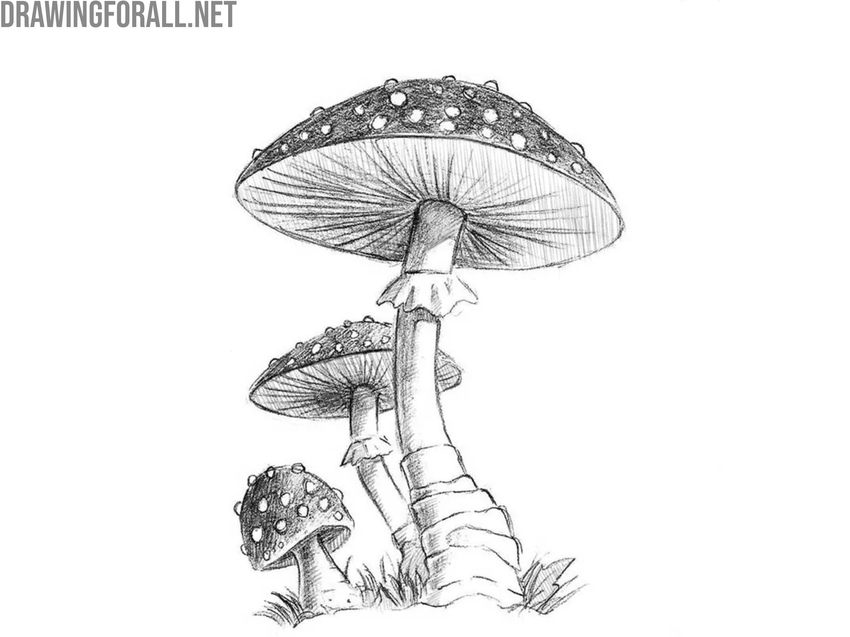
Easy mushrooms drawing tutorial
Our main mushroom drawing tutorial was quite detailed and extensive, but for some of you, it may have felt too advanced.
To make the process as simple as possible and reduce it to the most basic forms, we’ve created this additional lesson consisting of just four steps, without shadows or small details.
Start with this version, and once you feel confident, move on to the main, more complex tutorial.

As we wrote earlier, mushrooms come in many different types. You can try drawing a different kind of mushroom by changing some details.
For example, to draw champignons, you need to make the stems shorter and not draw dots on the top of the mushrooms
To sketch oyster mushrooms, you need to make the stems even shorter and the caps wider. If you want to illustrate porcini mushrooms, then you must, on the contrary, sketch larger stems and smaller caps.
We hope you really enjoyed this mushroom drawing tutorial. Share our lessons, write comments, visit our site more often and wait for new guides.


that was So ard but this was the best thing EVER
Thank you so much for such good words.
Great lesson! Thanks!
Thank you too
I agree but it is kinda hard
That was a good lesson but it’s ard.Thanks
Thanks. We’ve added more steps, so now this drawing tutorial is much easier.
I just stared this and it is so hard! But I know I can do this!!!!!!!!!!!!!!!!!
Thank you so much for posting this hard mushroom, I’m not giving UP!!!!!!!!!!!!!!!!!!!!!!!!!!
Thanks, Amber. Now this mushroom drawing tutorial is much easier than when we published it. We’ve added more steps and descriptions.
It’s amazing! Thank u <3 greetings from Poland.
Thank you so much. Nice to see the guide was useful.
This mushroom drawing helped so much
This looks hard but was actually very helpful and made it much easier. Thank you.
Happy to hear it helped. Sometimes the drawing looks harder at first, but when you start drawing, it looks easier and easier.
super cool
Thanks, Mae. Glad you liked it.
Thank you so much! In less than an hour I was able to draw recognizable mushrooms <3 I've been an antitalent in my whole life so far;)
Great job, Szilvia, really nice to hear you got a clear drawing so quickly. Keep going, it only gets easier from here.